
Input Guidelines
Everything Brandmachine generates is built from the images you upload. The input sets the ceiling: a sharp, evenly lit photo of a single garment gives the model everything it needs to reproduce the piece faithfully, and a small, dim or cluttered one does not. Nothing later in the pipeline recovers what the input never contained.
These guidelines apply to every garment and product image you upload, in Product Studio, Shot Planner, Campaigns and Designer.
Three ways to shoot it, all of them work
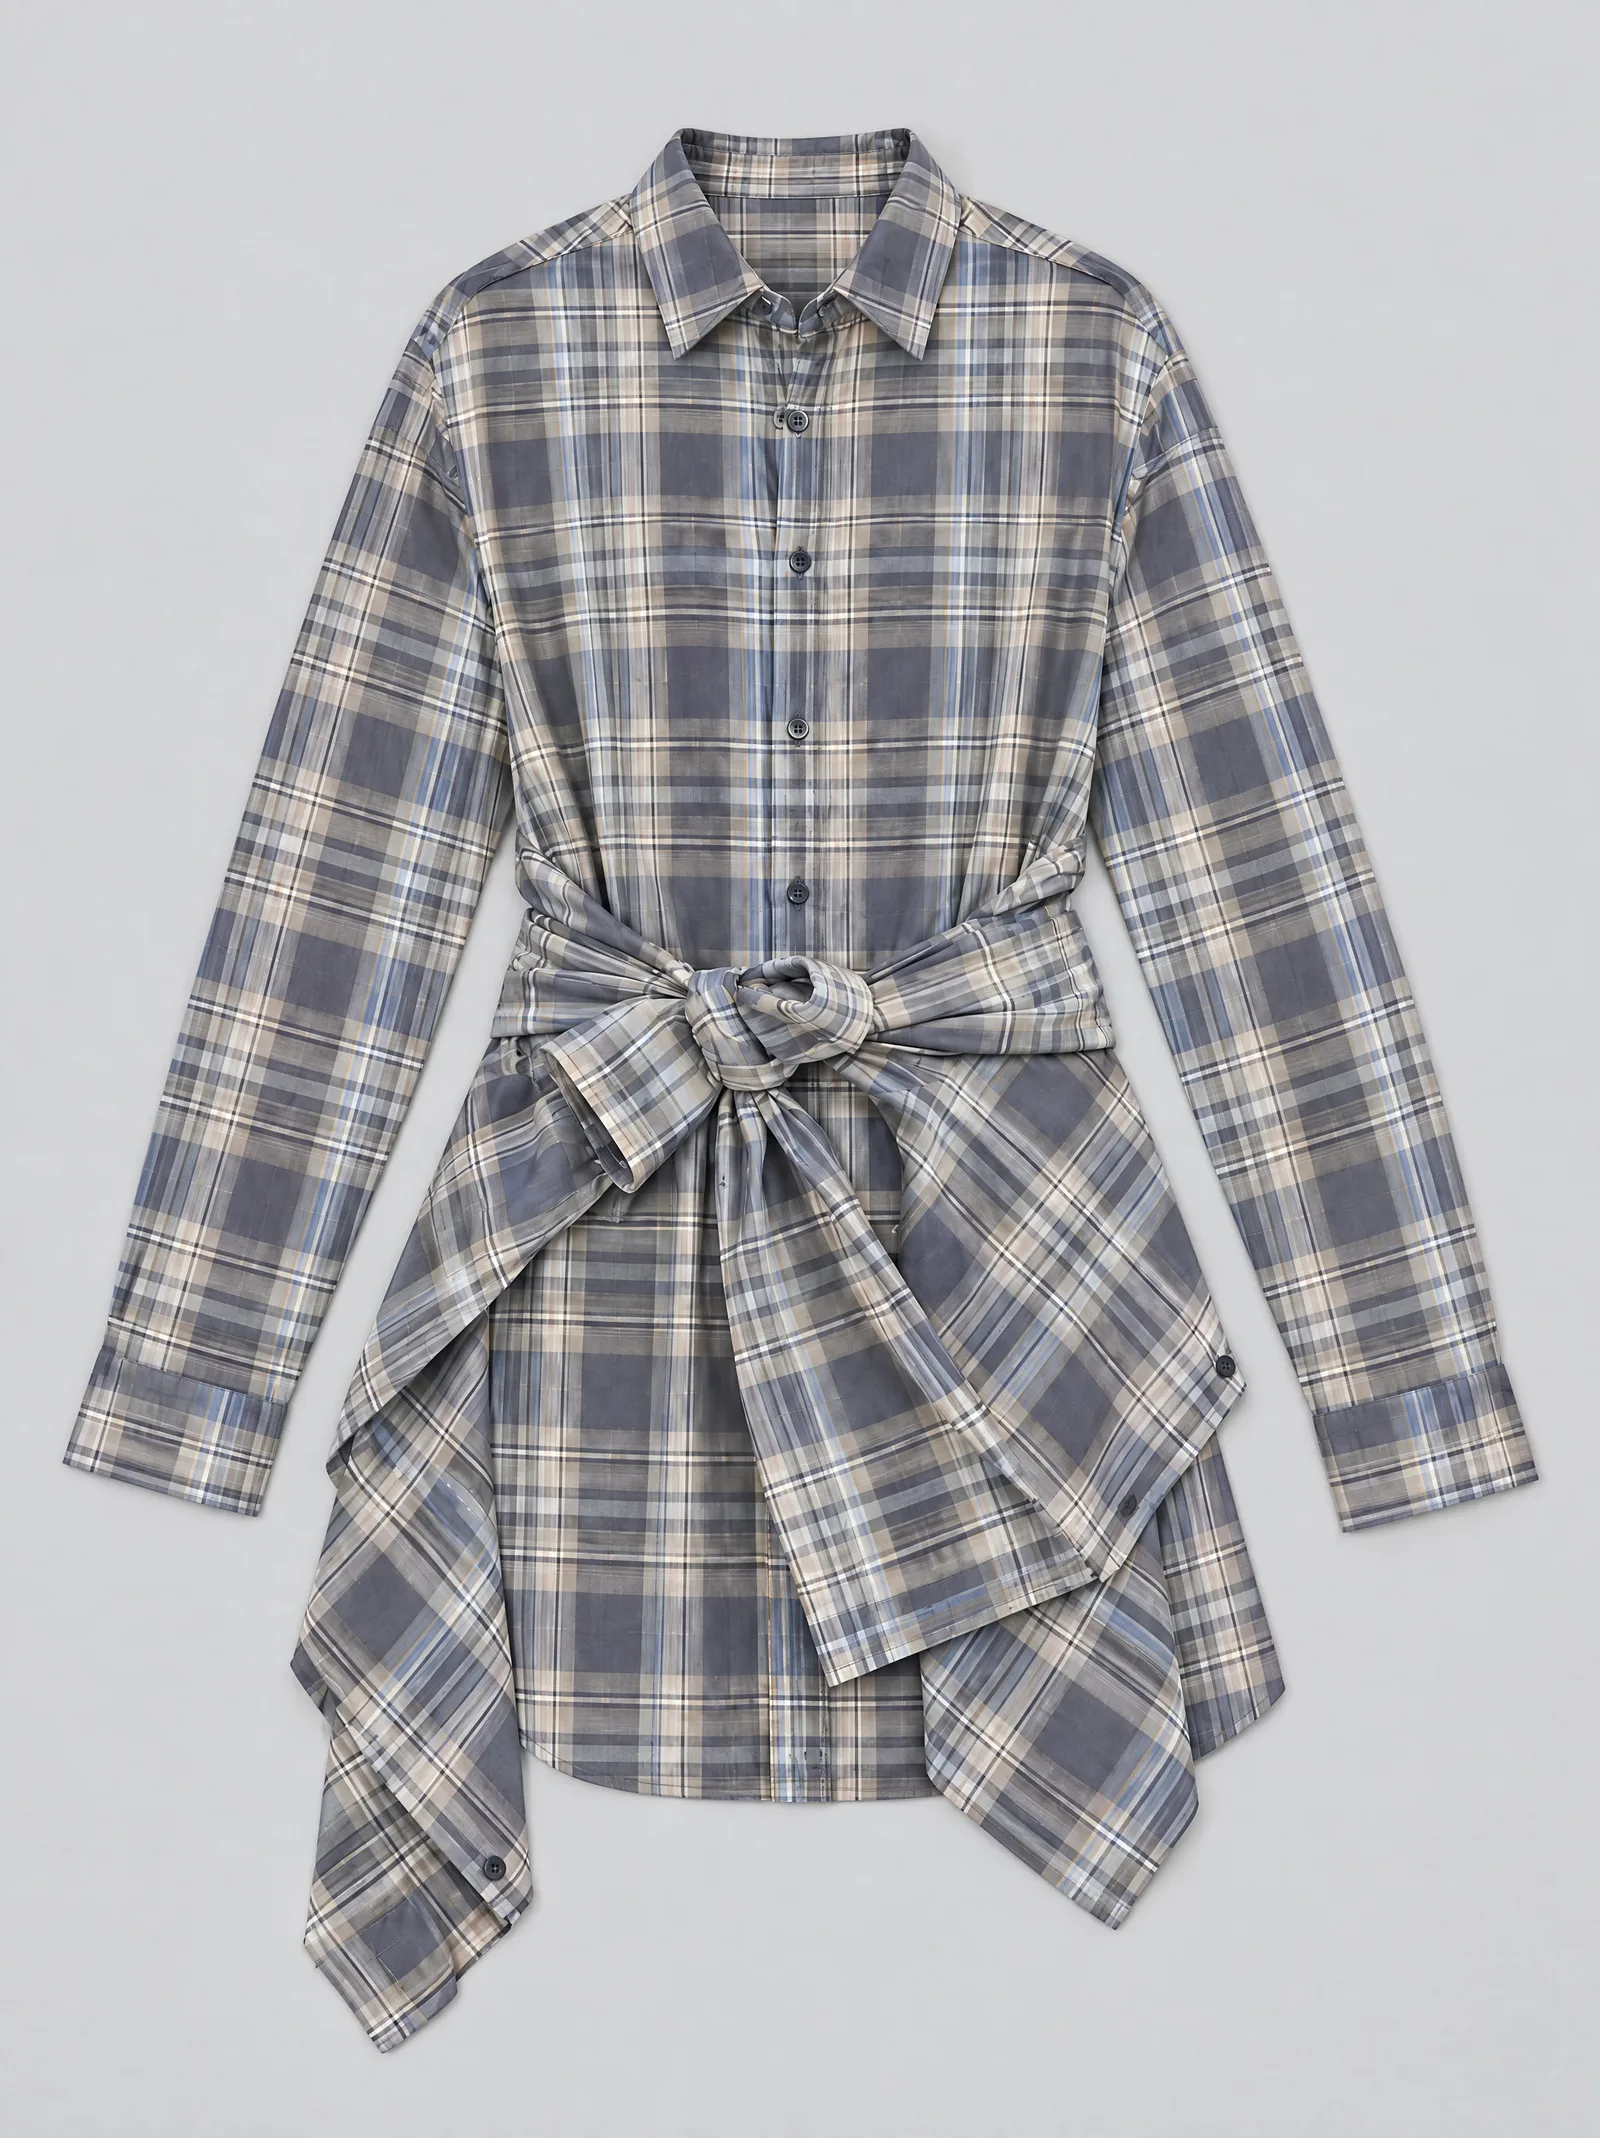
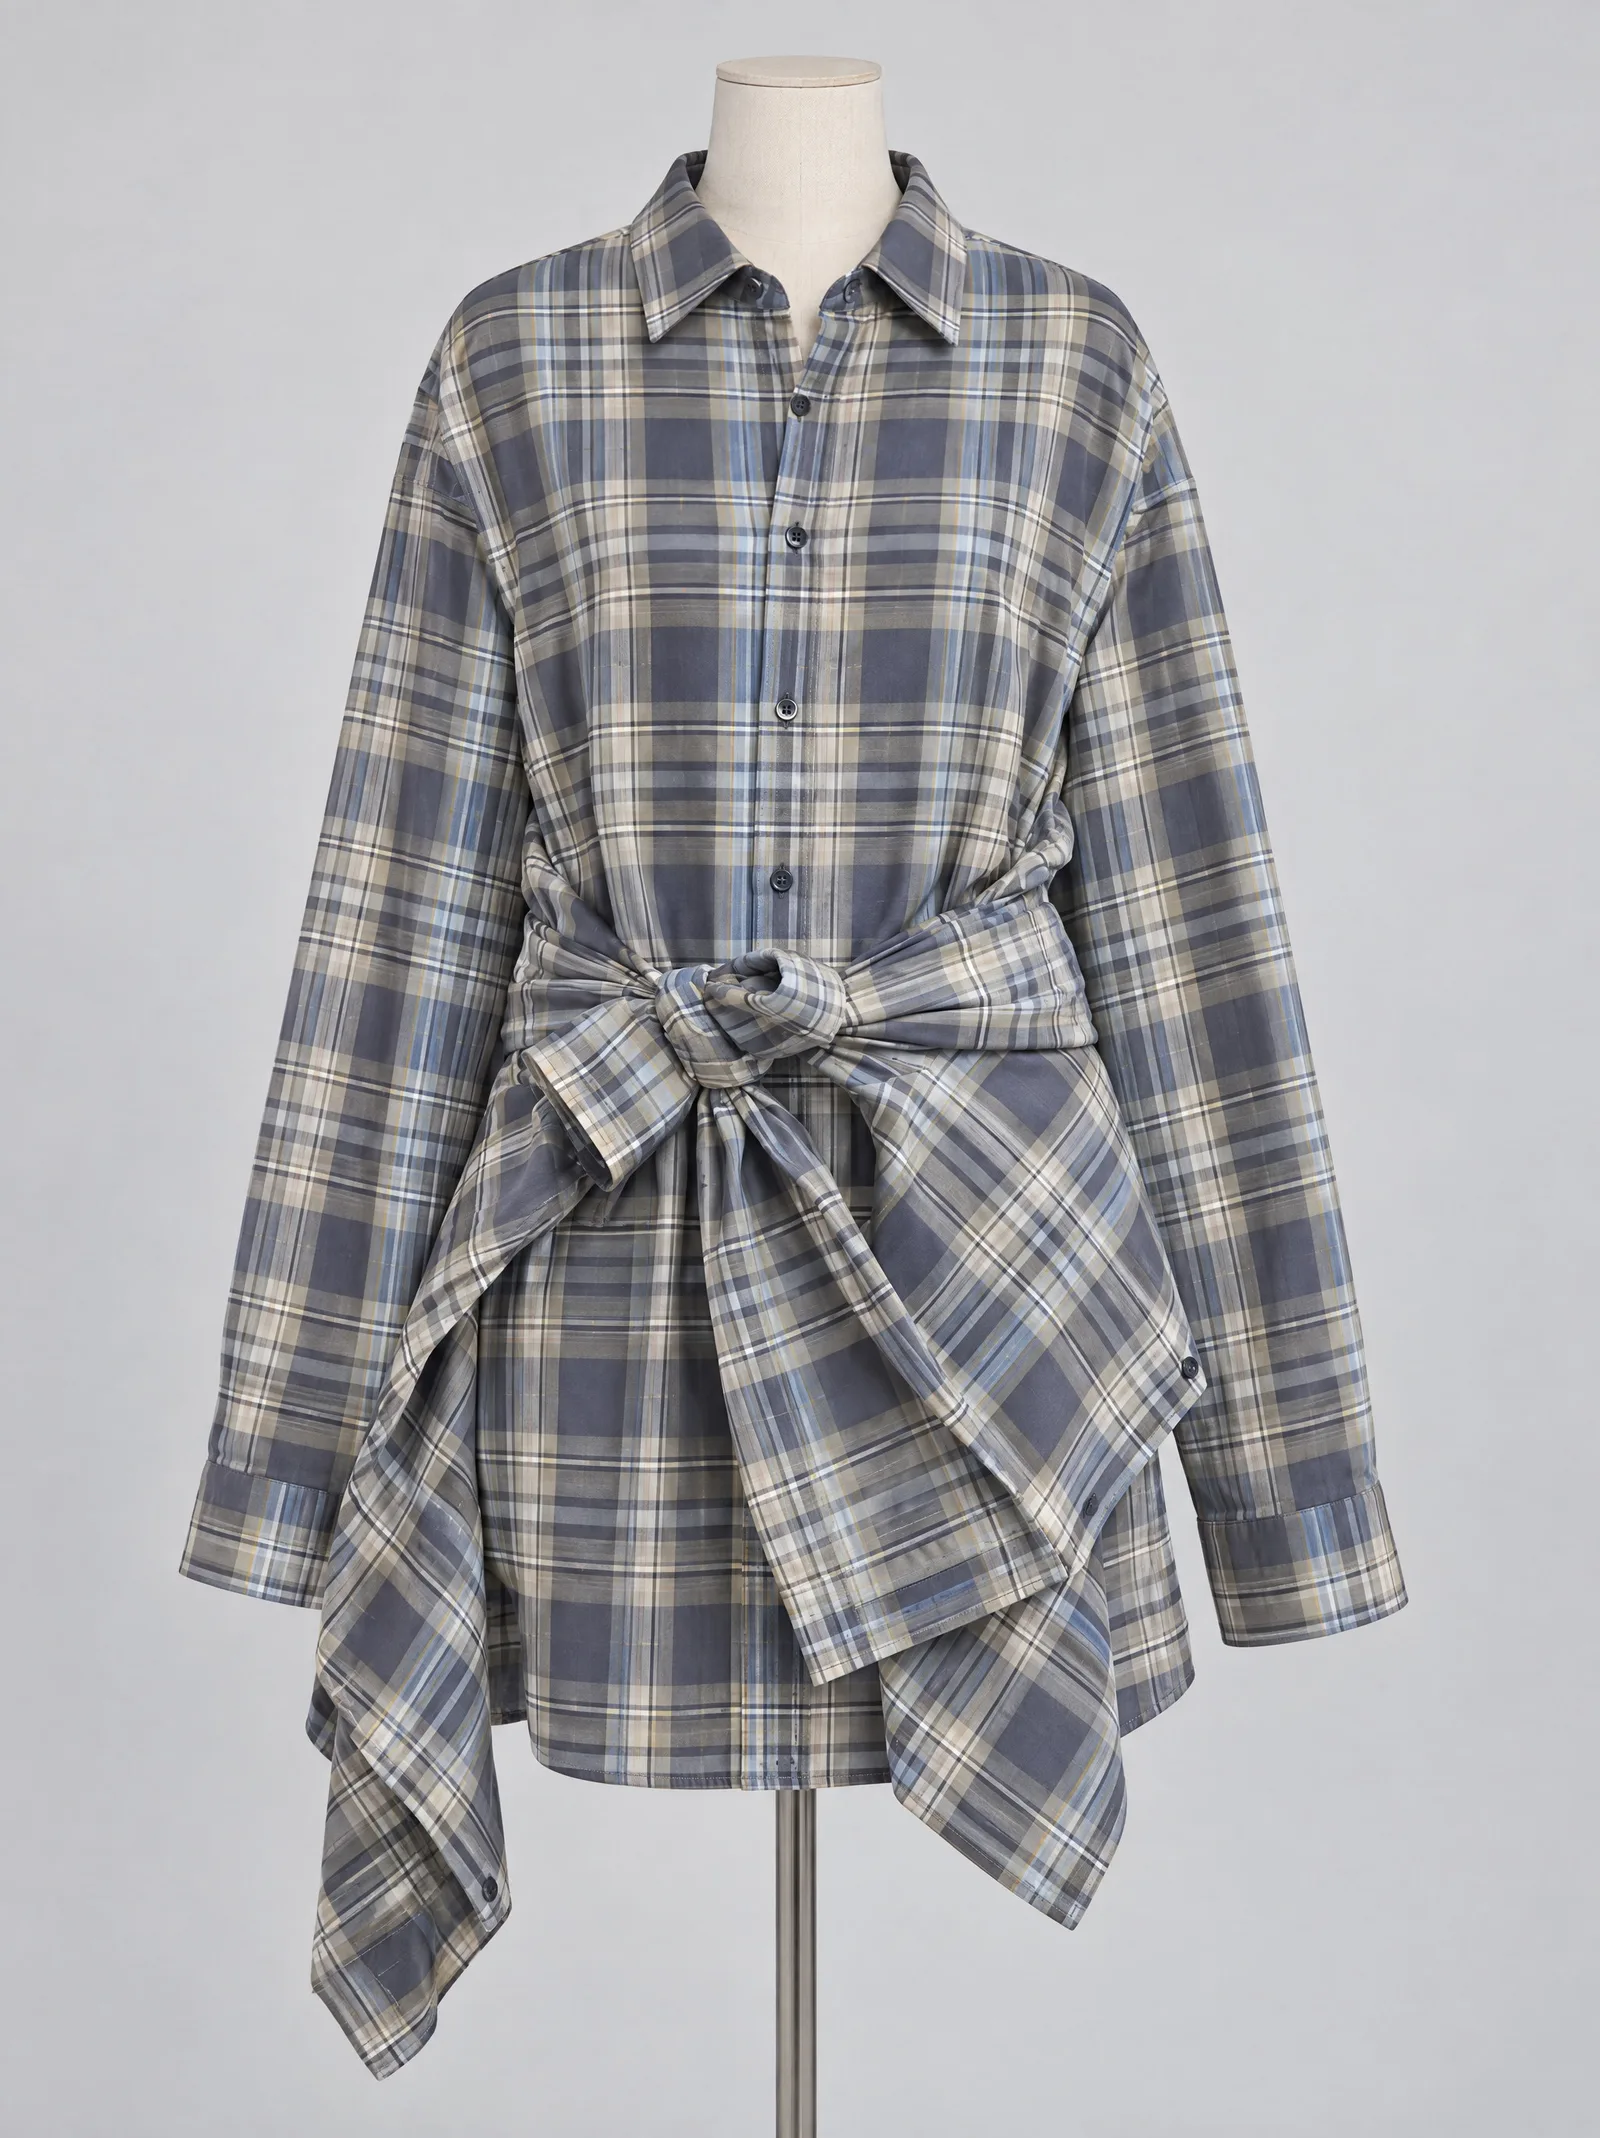
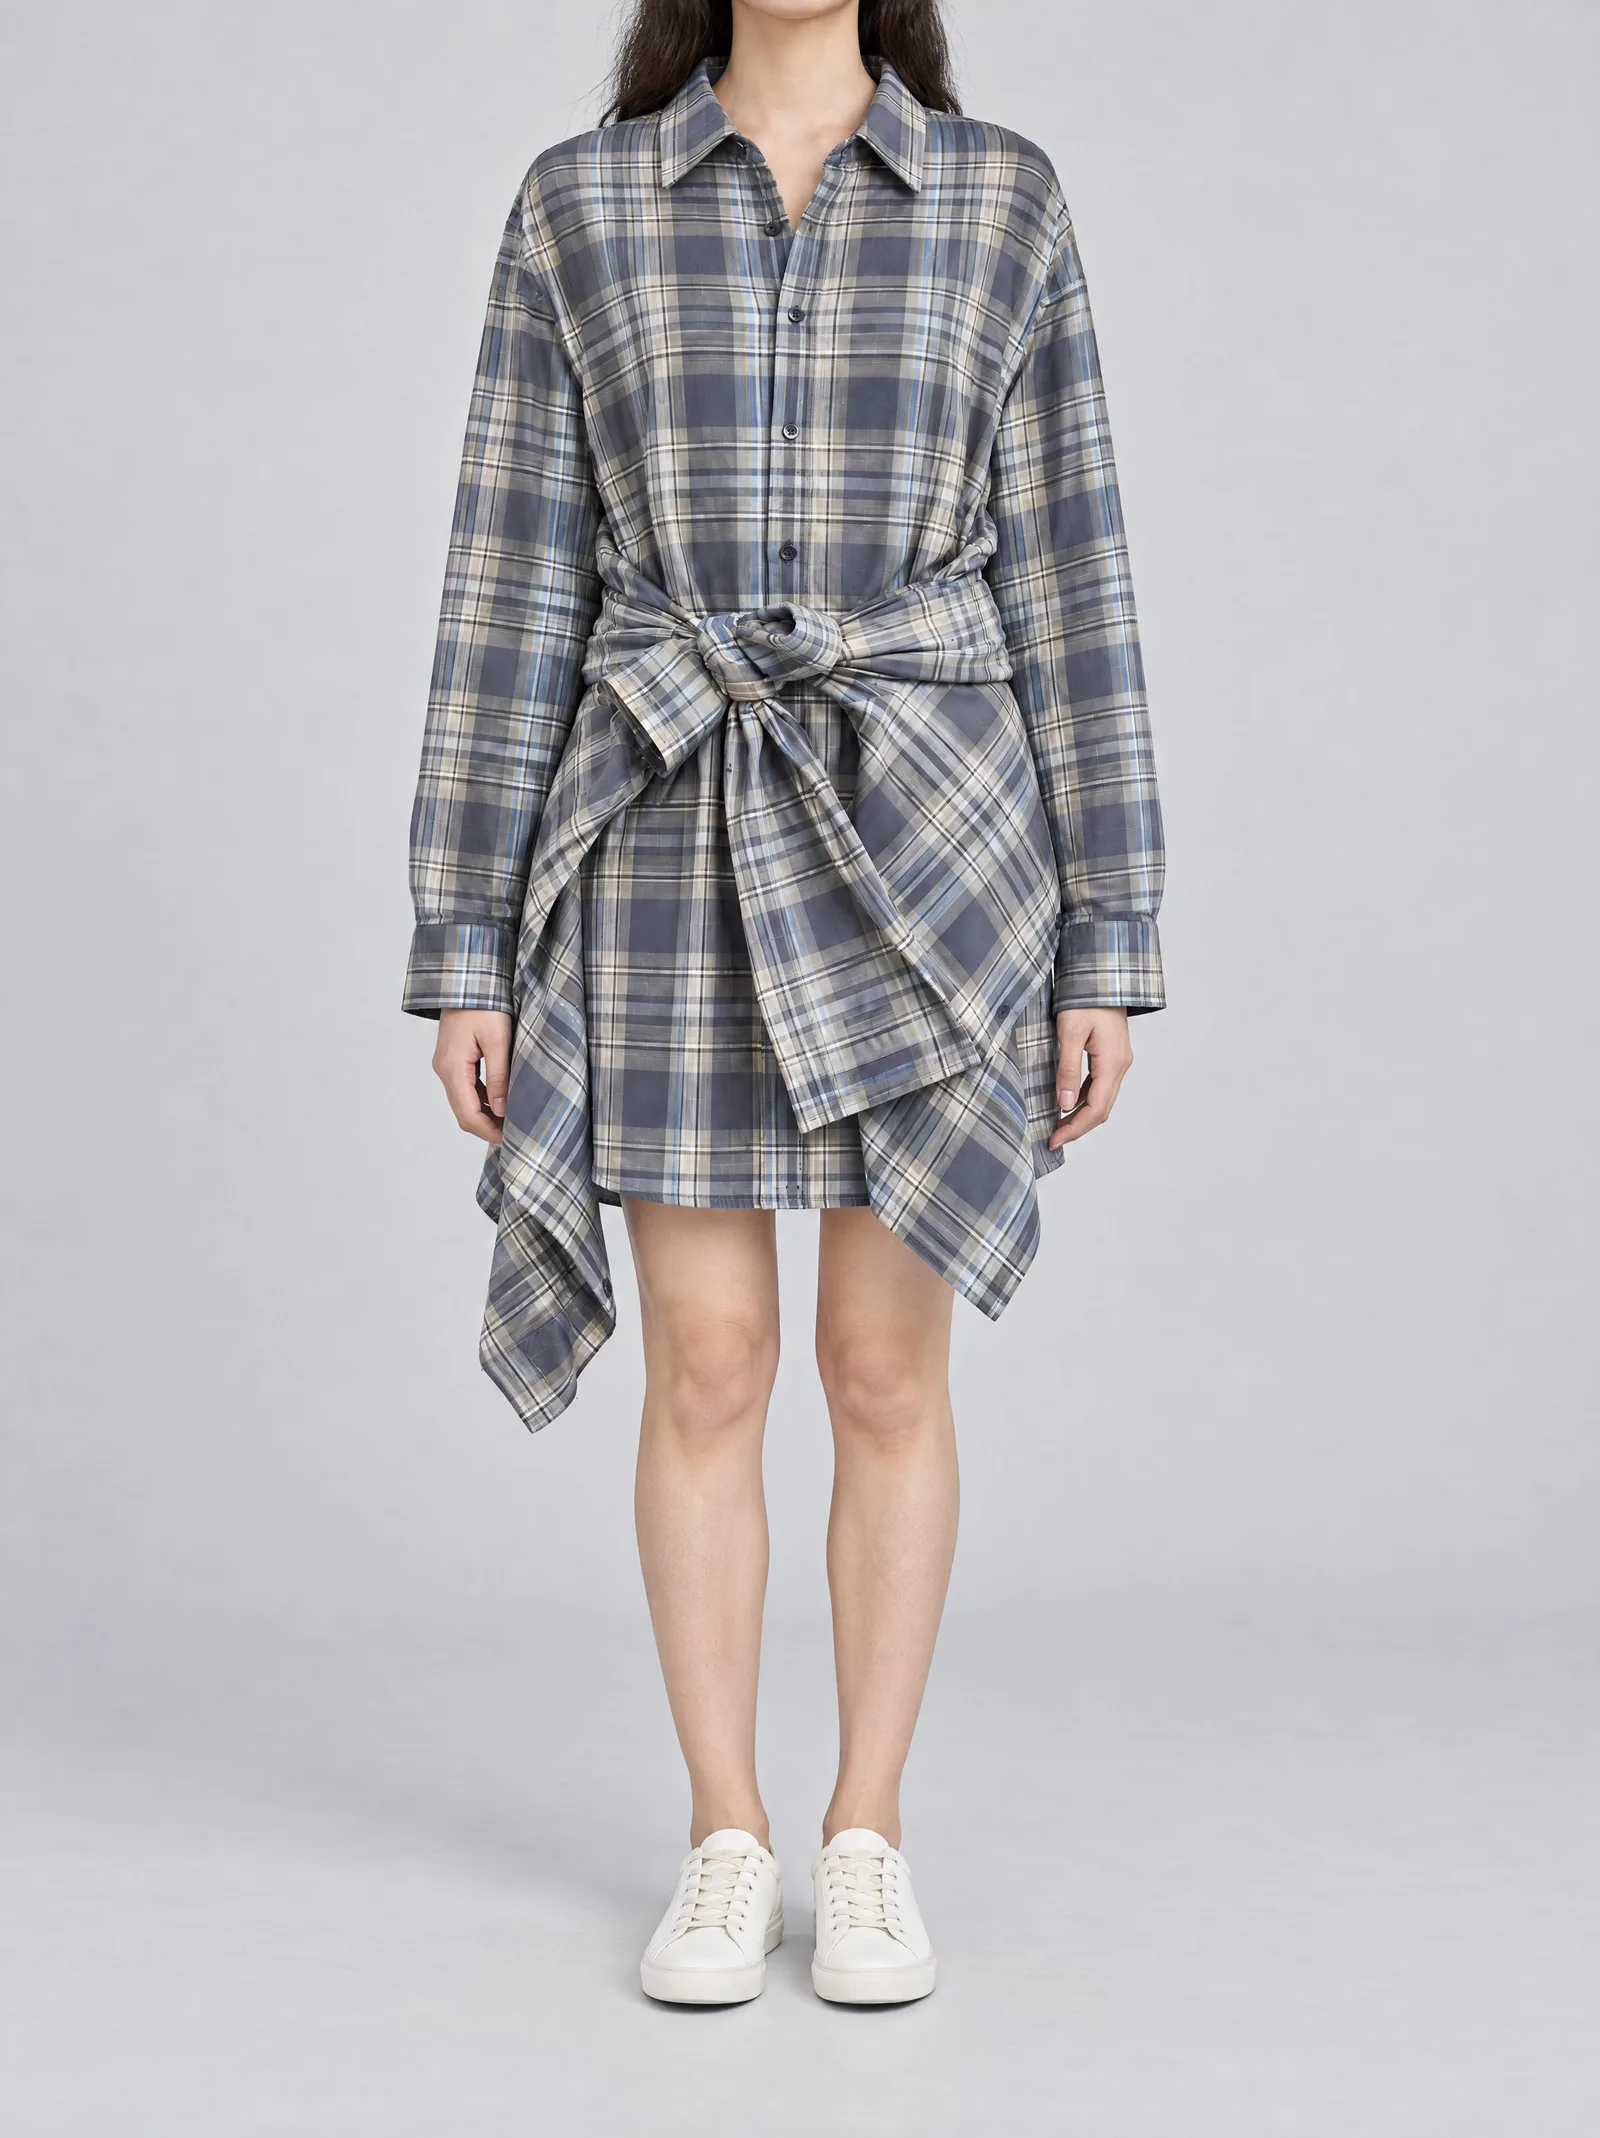
Flat lay or packshot. 2D flat or 3D ghost. Yes, a garment photographed flat on the floor or on a table is fine, and it is what most brands already have. Its weak point is proportion: a flat garment carries no information about how big it is or how it falls on a body, so the model has to work the fit out for itself.
On a bust or mannequin. The best ratio of effort to quality. The form gives real proportions: where the shoulder seam sits, sleeve length relative to the body, how the volume falls. No face involved.
On a person, head cropped. The strongest input. A body inside a garment produces real drape and tension, and you control the styling. However you set the piece up on the person is what comes out. Always crop the head, or at minimum the face.
You can mix all three inside a single outfit.
The six checks
Six things decide whether an input works. Run down them before you upload.
1. Resolution
At least 2000 px on the long edge, from the original camera file or export. A phone photo at full quality is enough. A website export, a screenshot or a thumbnail is not.
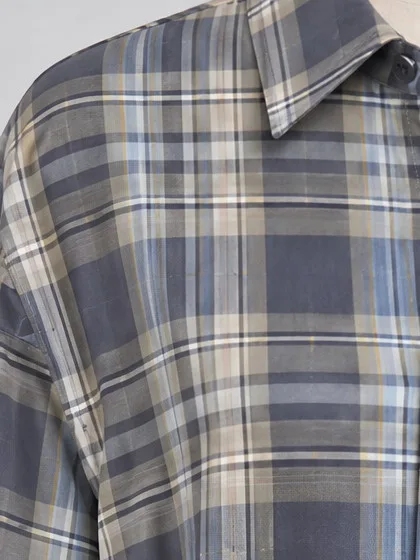
The original file. Every check line holds its edge, the fine yellow and white overcheck reads as separate threads, and the weave of the cloth is visible.
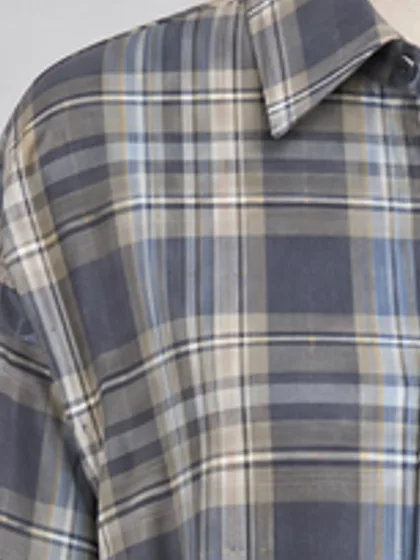
The same garment from a 1000 px website export. The check lines have smeared into each other, the fine overcheck has dissolved and the weave is gone entirely. Nothing later puts any of it back.
A plain white shirt is forgiving. A print, a weave, a stitching detail or a trim is not.
2. Light
Even and neutral. No hard shadows, no direct sun, no coloured light. The colour in your photo is the colour you get back.
Soft frontal light, neutral white balance, no shadow thrown behind. The slate blue is the real blue and the cream is still cream.
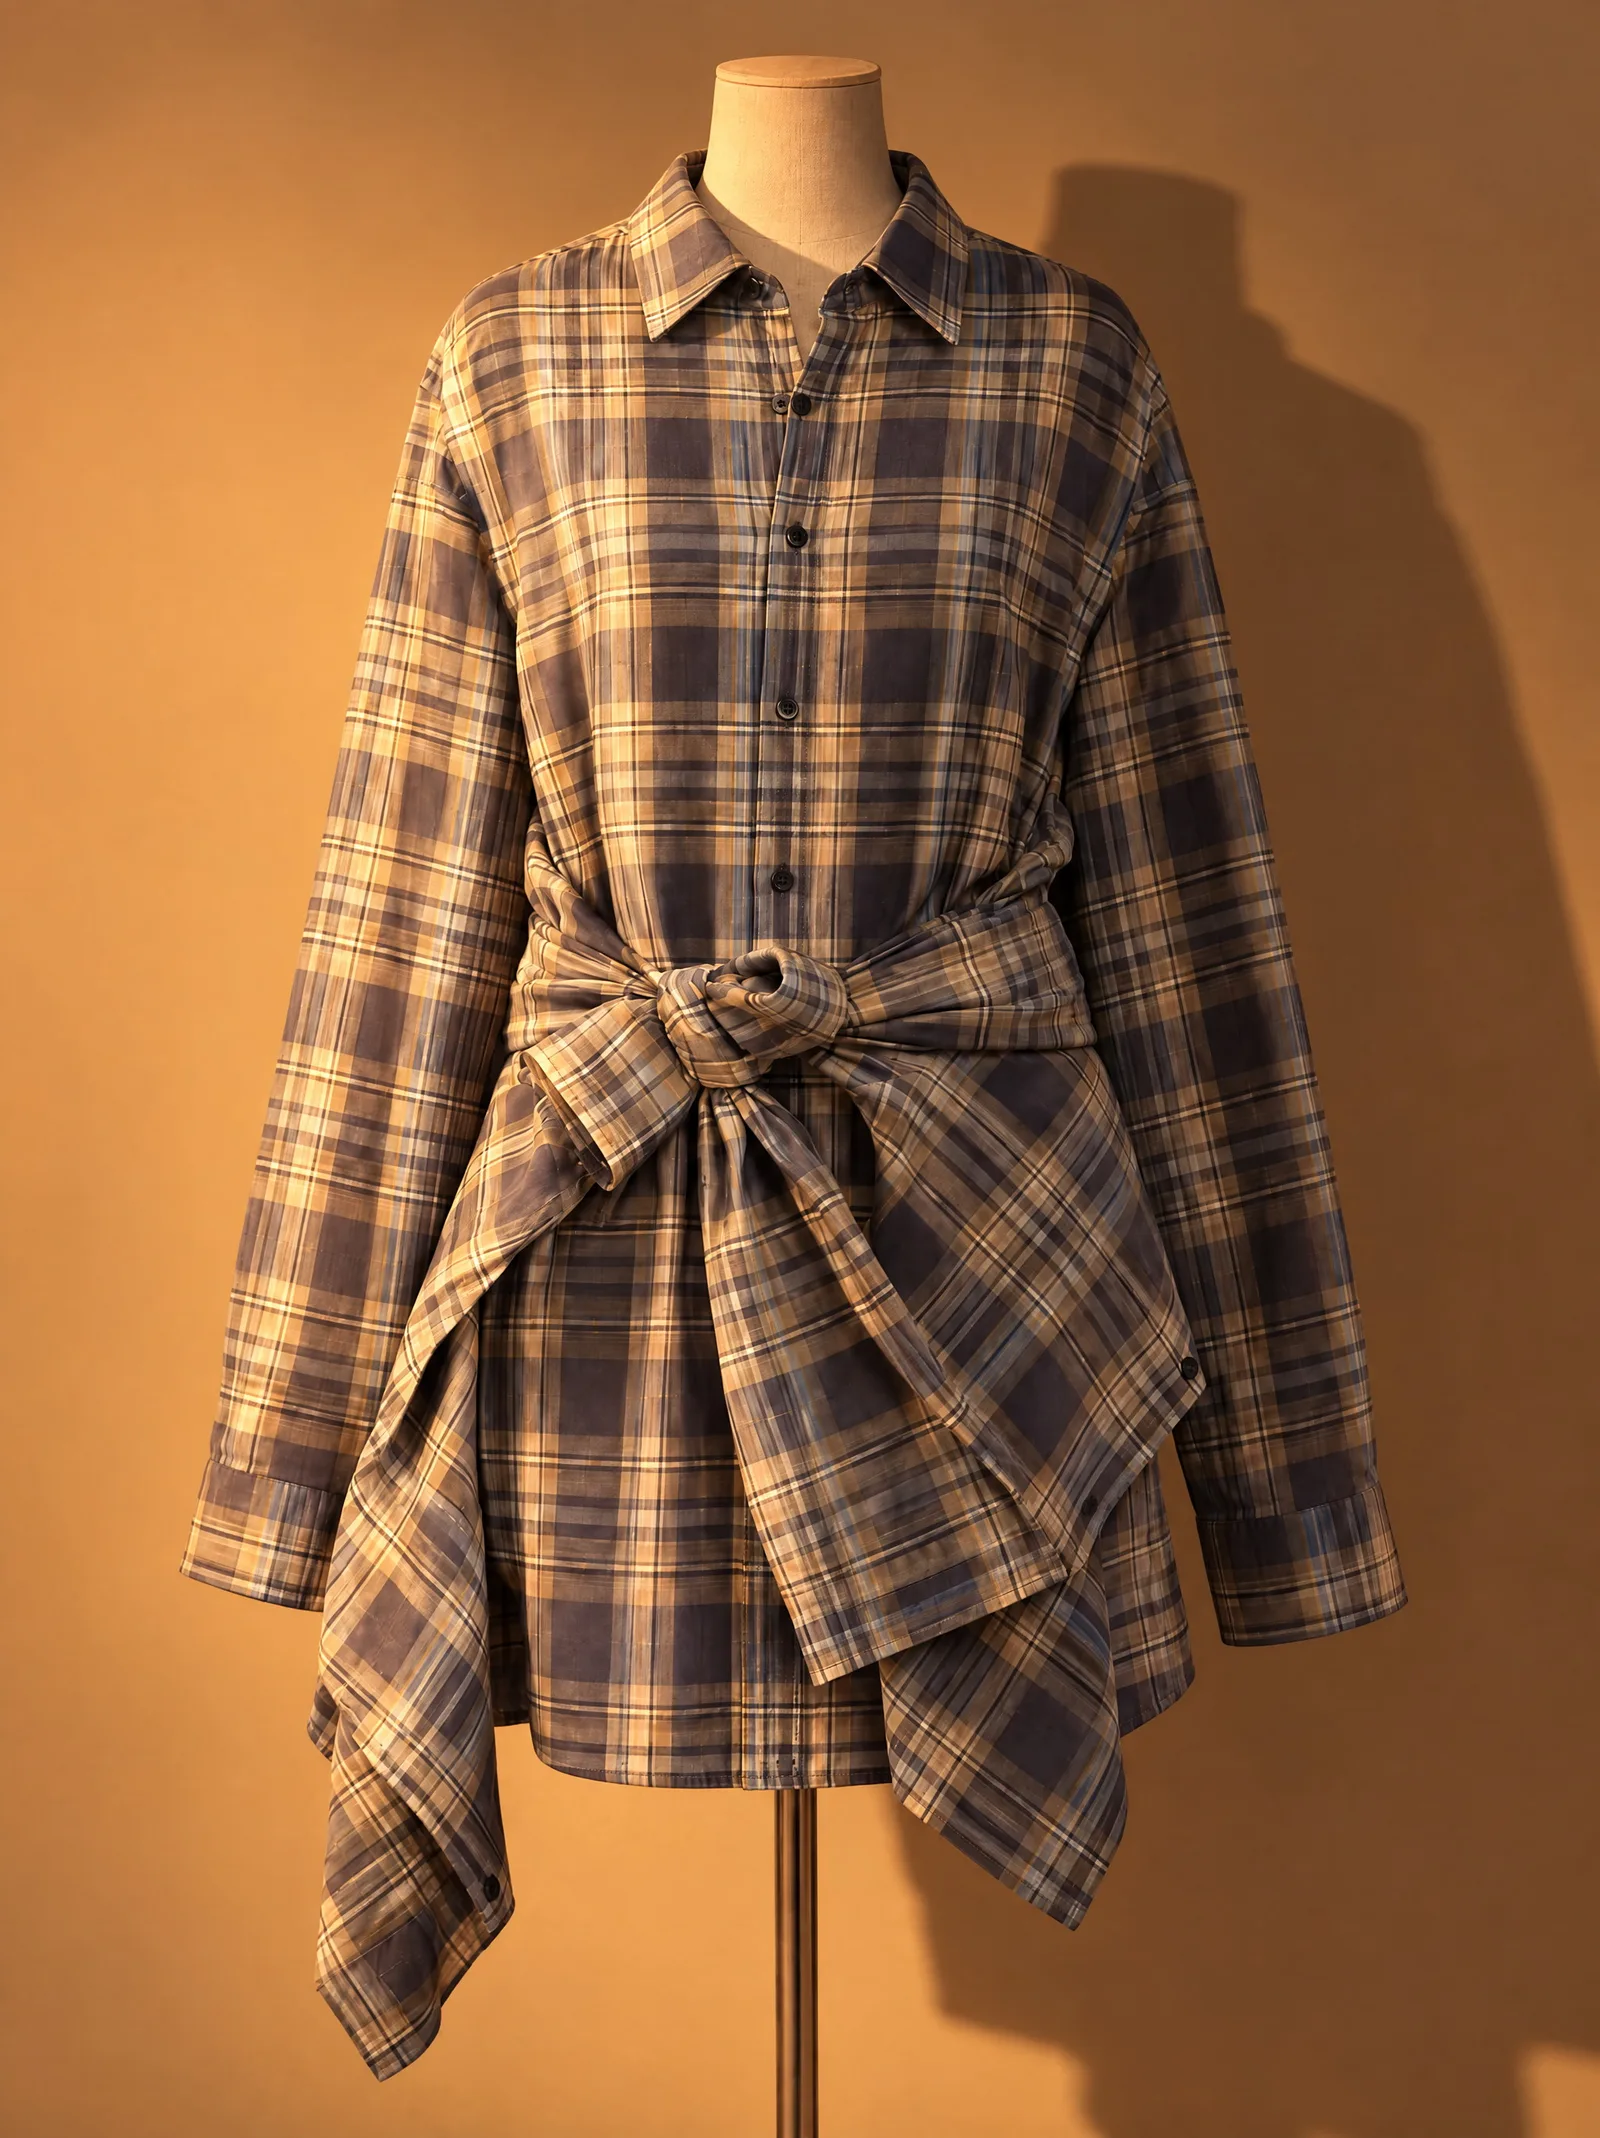
Warm showroom downlights from one side. The cream has gone amber, the slate blue has turned brown and one half of the piece is brighter than the other. We have no way to know which version is your product.
3. Background
Plain and empty. Plain does not mean pristine: an ordinary room with a scuffed wall is fine, and so is a mannequin standing slightly crooked. What matters is that nothing else is in the frame.
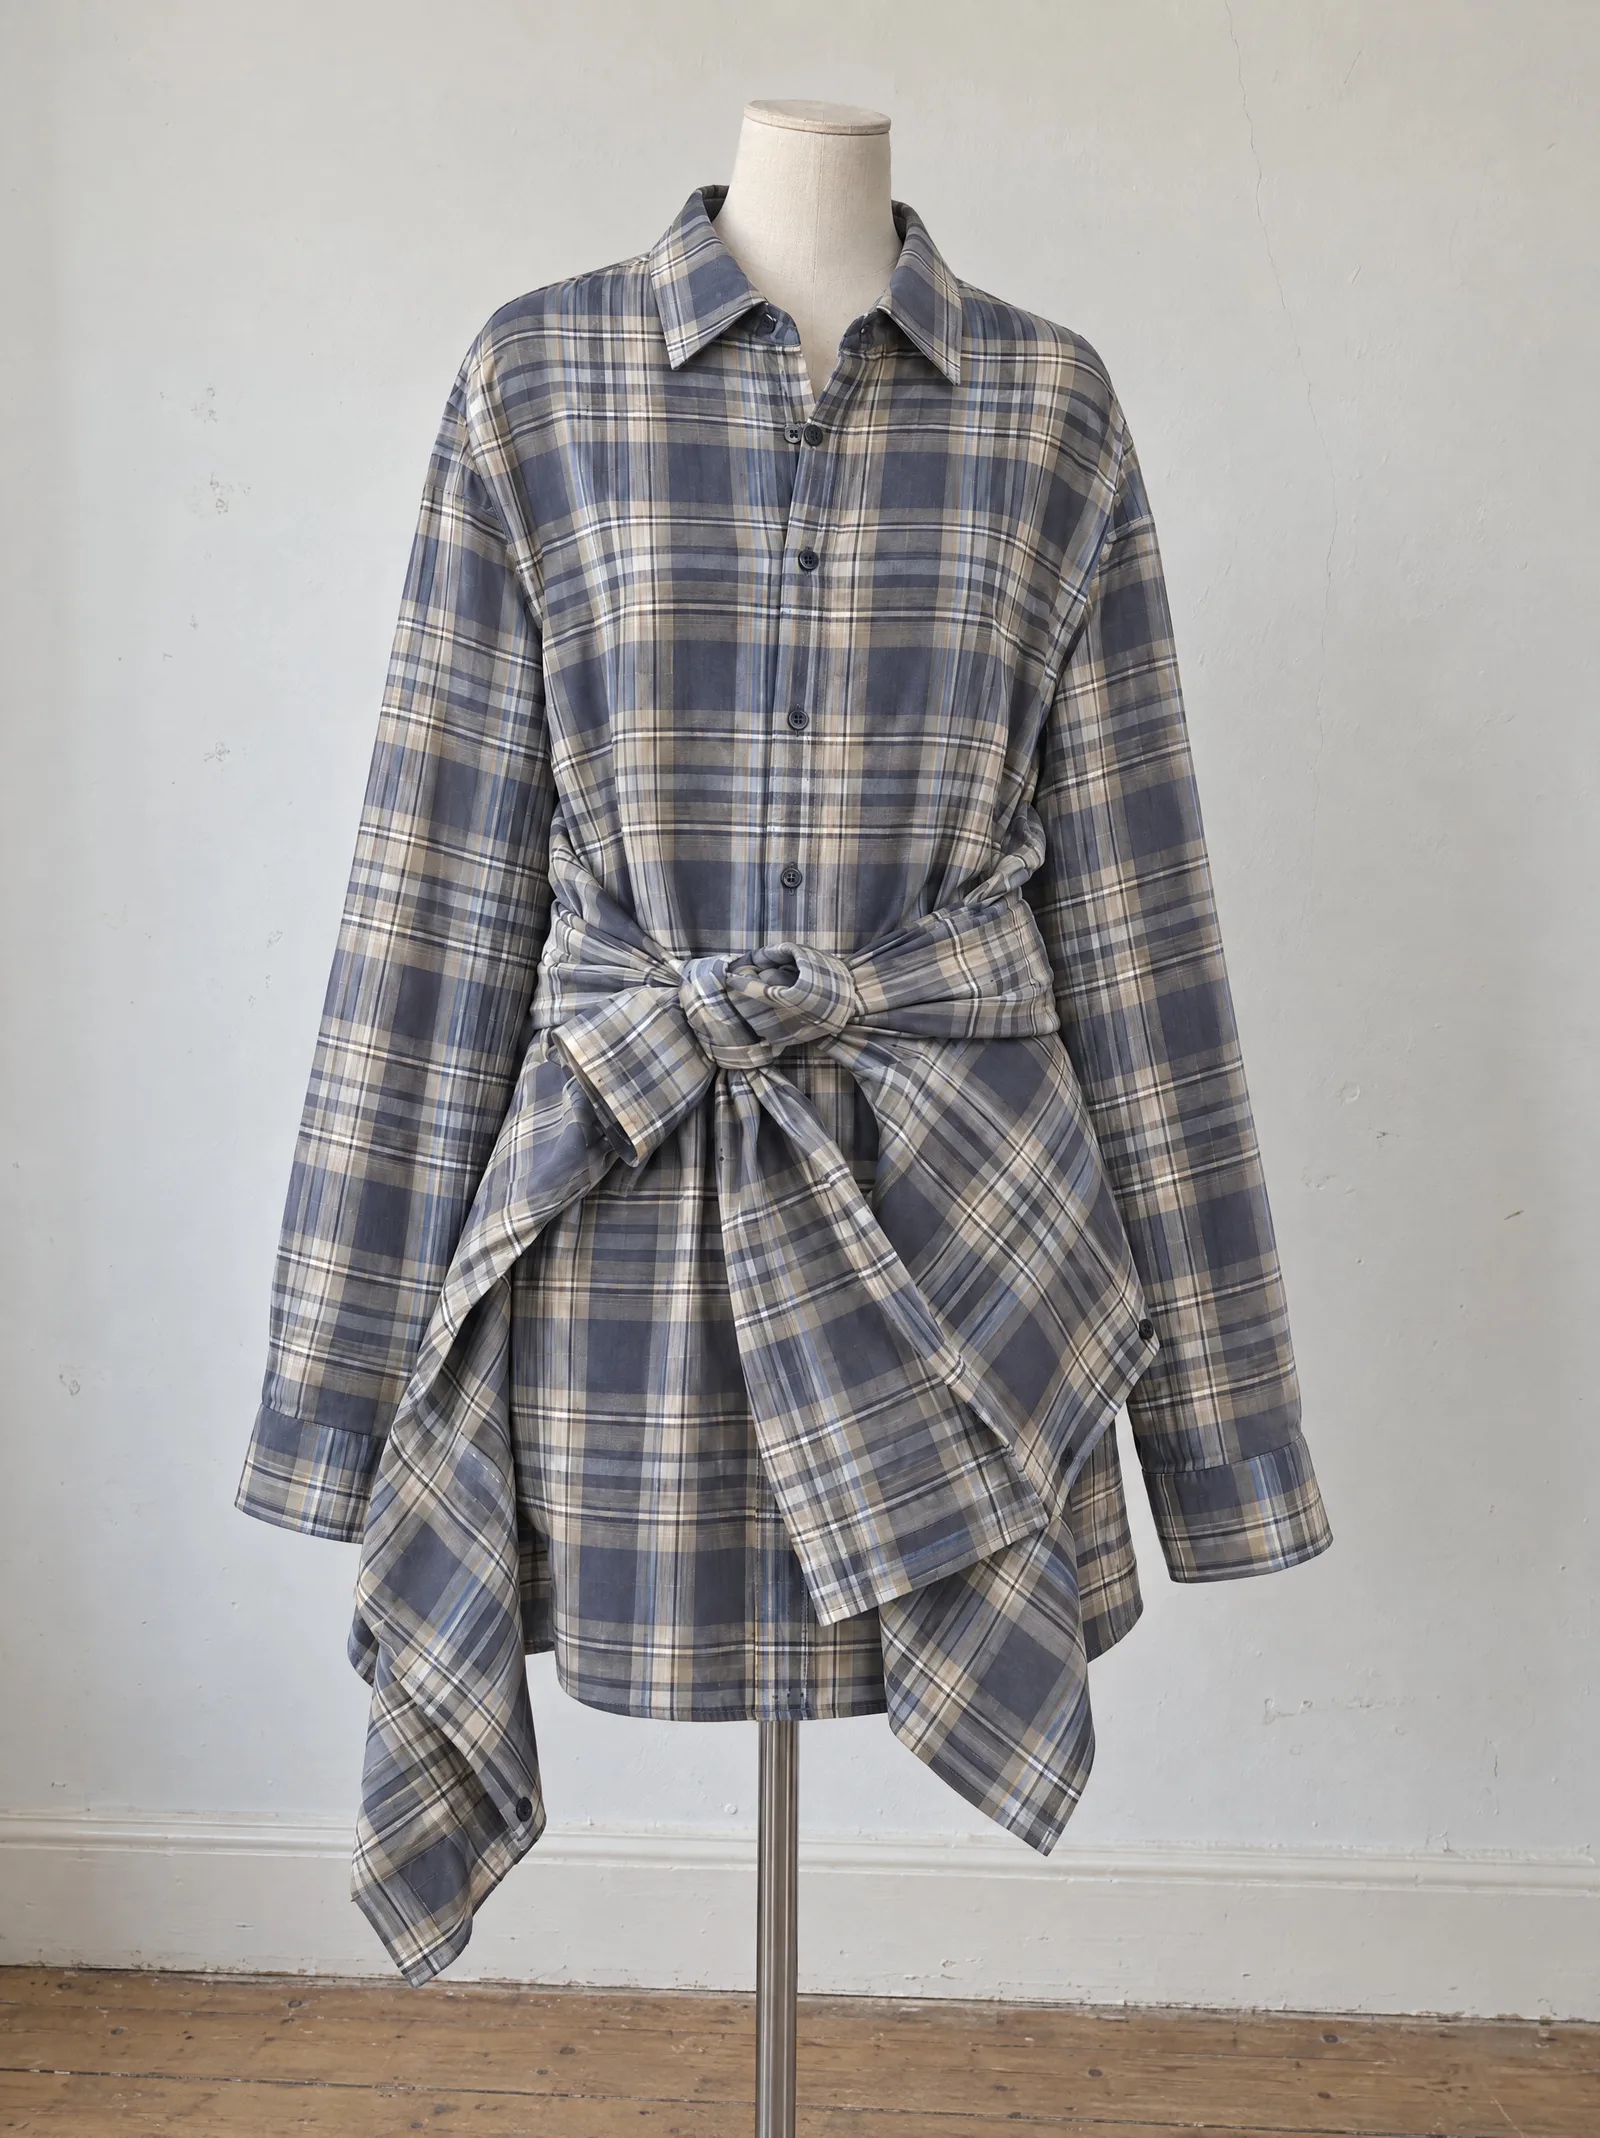
A working room, not a studio. Marked wall, visible skirting, bust a little off centre, daylight from a window. It is only the garment in the frame, and that is enough.
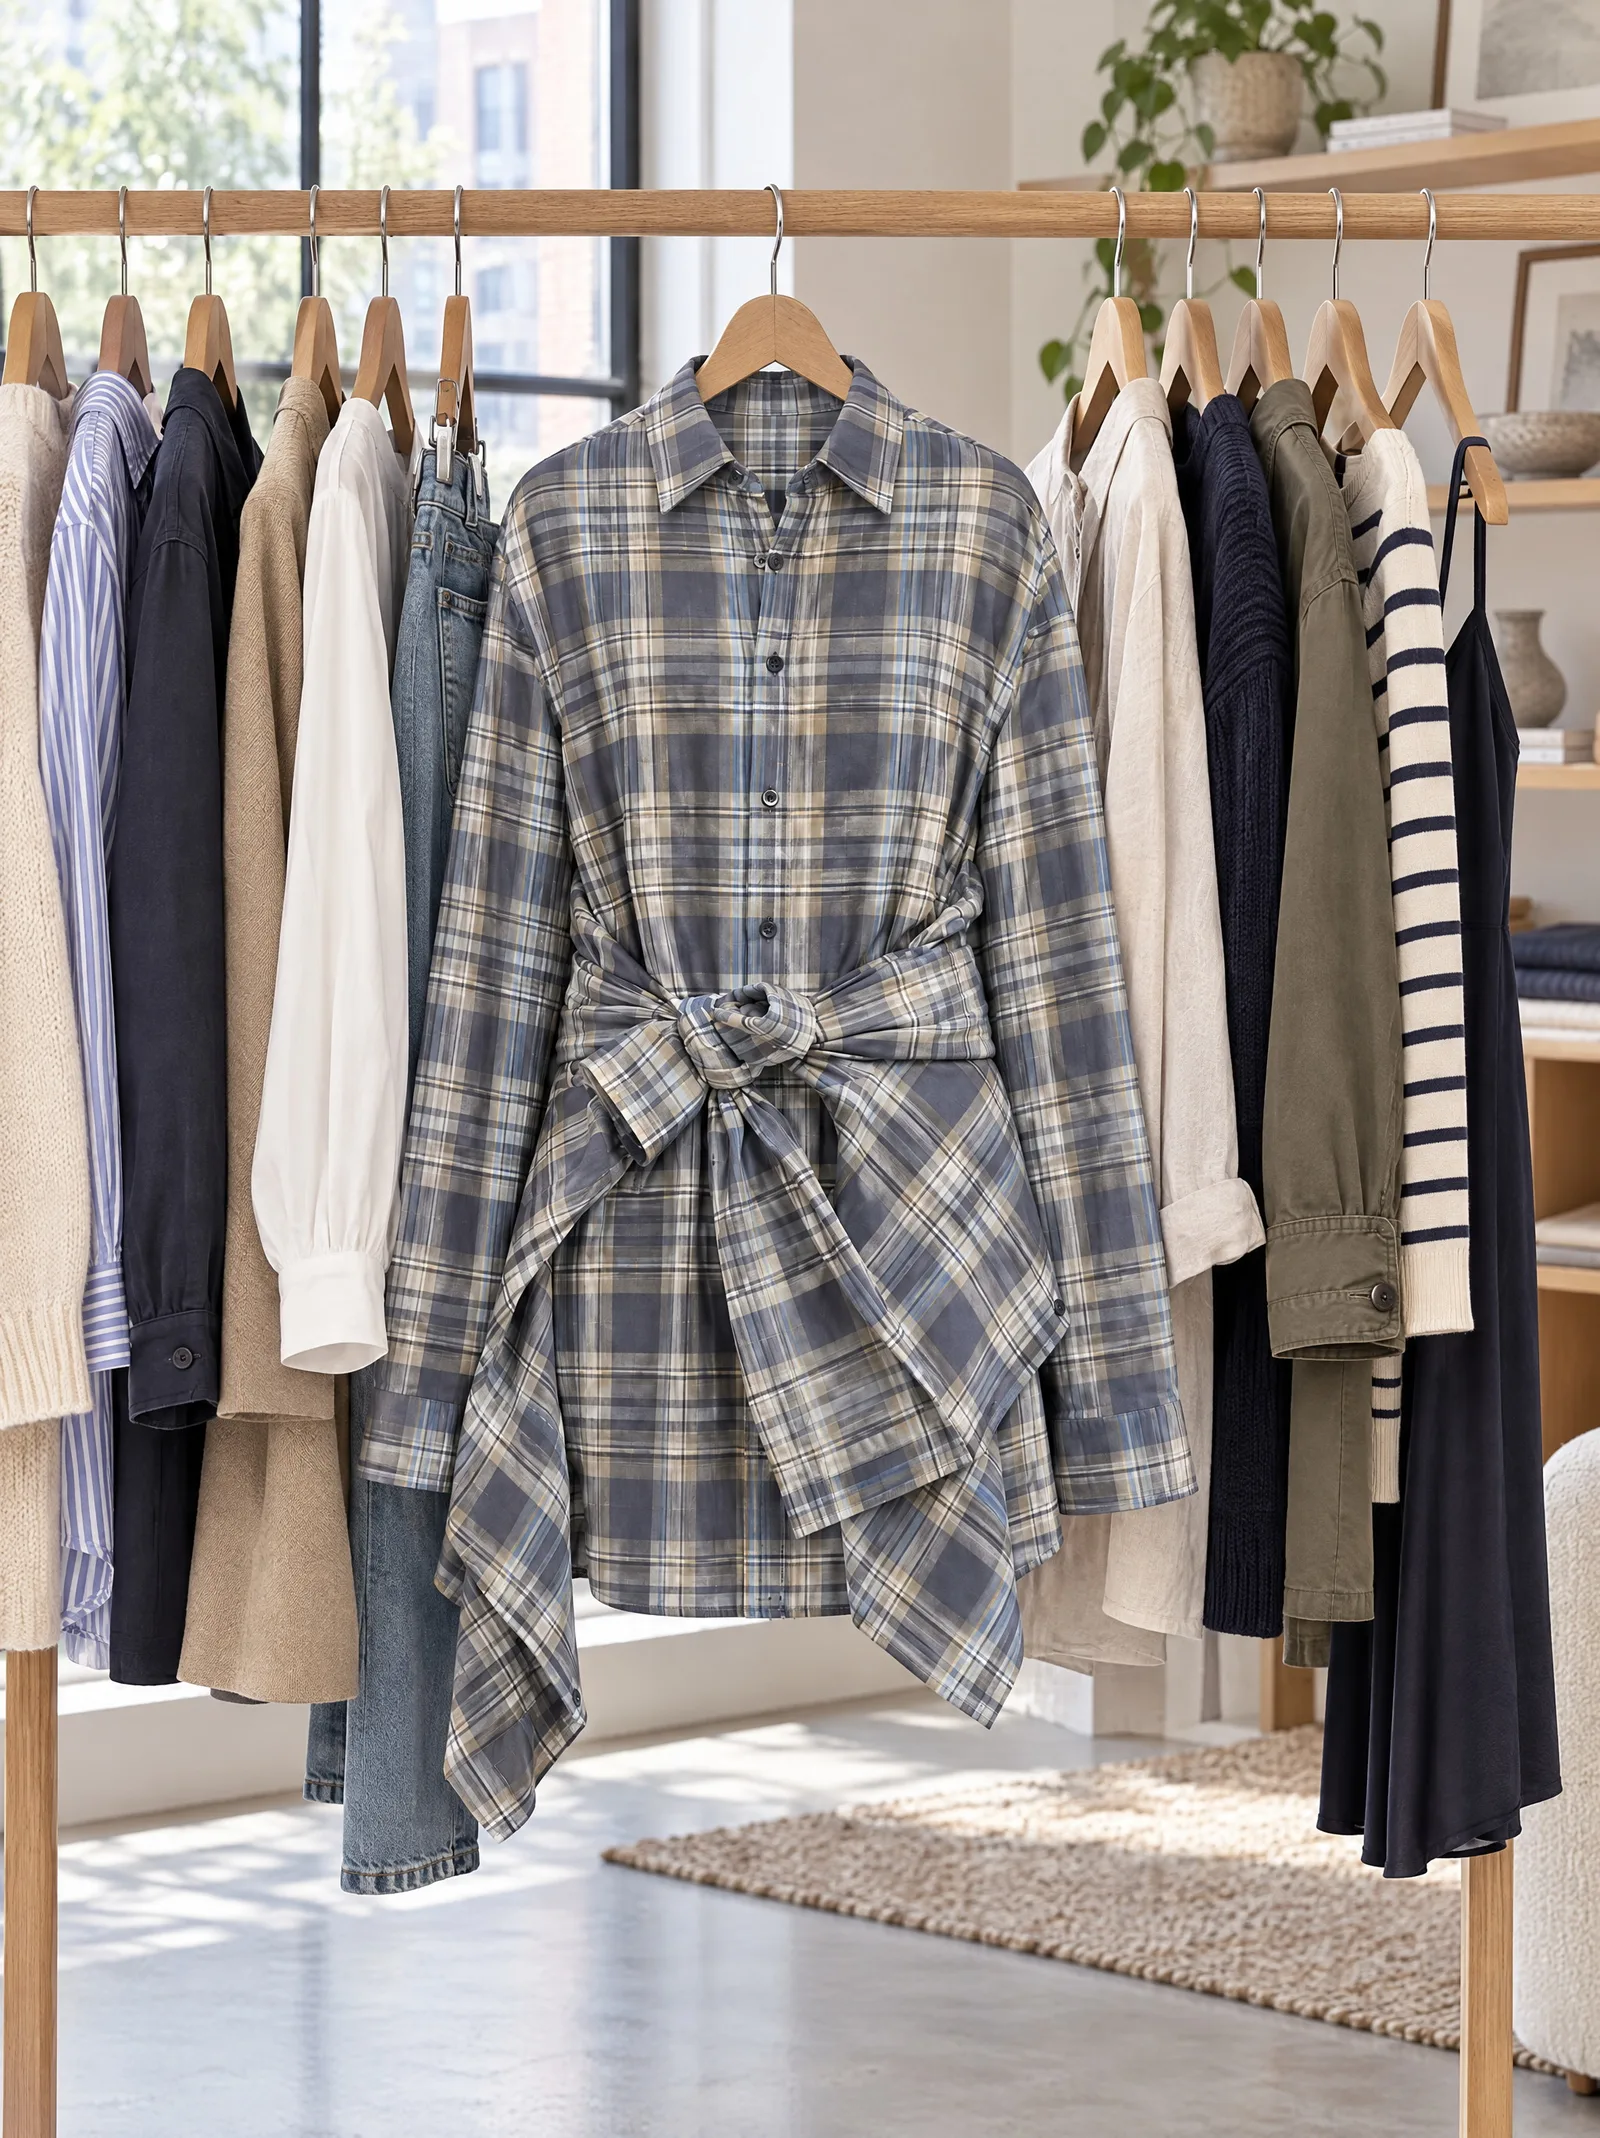
A showroom rail. The neighbouring garments are in the frame, part of the room is behind it, and the piece we are meant to reproduce is one of a dozen.
4. Faces
None. Crop the head out before uploading. A face pulls the model away from the garment.
Cropped at the jaw. You keep the drape and tension of a real body and lose nothing.
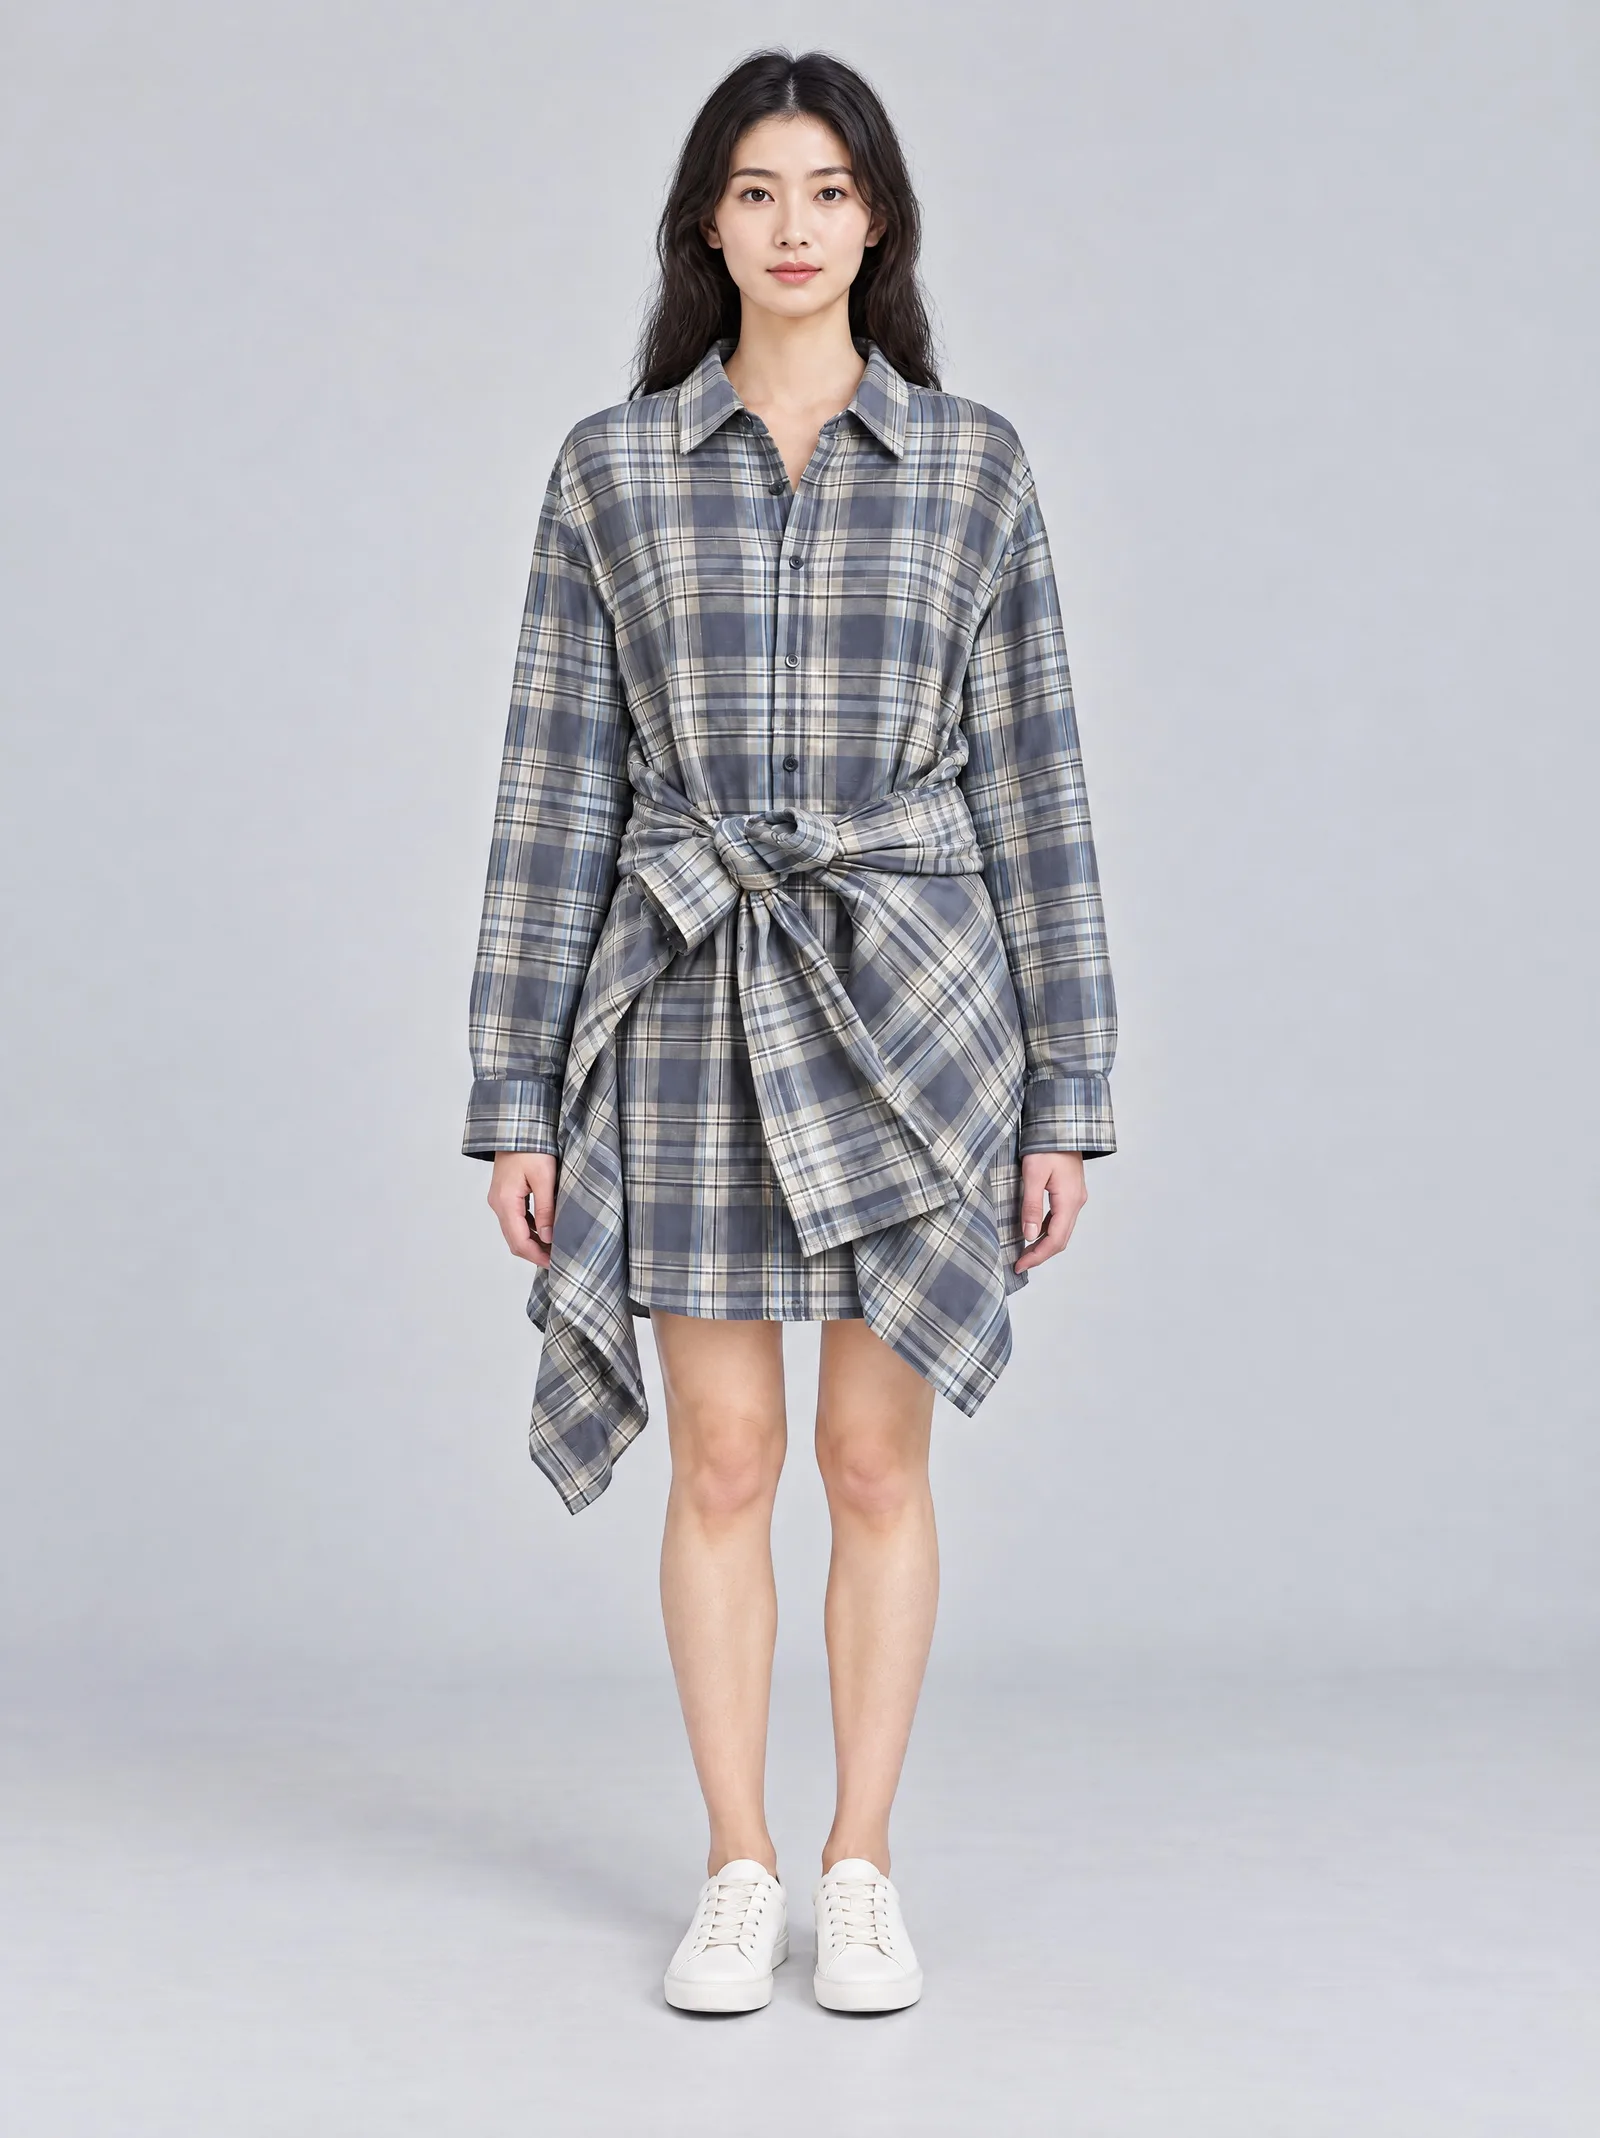
The same photo with the head in it. Now the strongest thing in the frame is a person rather than a shirt dress.
This applies to garment and product inputs only. Uploading a real person as a Fashion Model is a separate flow with its own rules.
5. Framing
Whole piece, front on, shot from chest height, nothing cut off at the edges.
Straight on, the whole garment inside the frame with space around it.
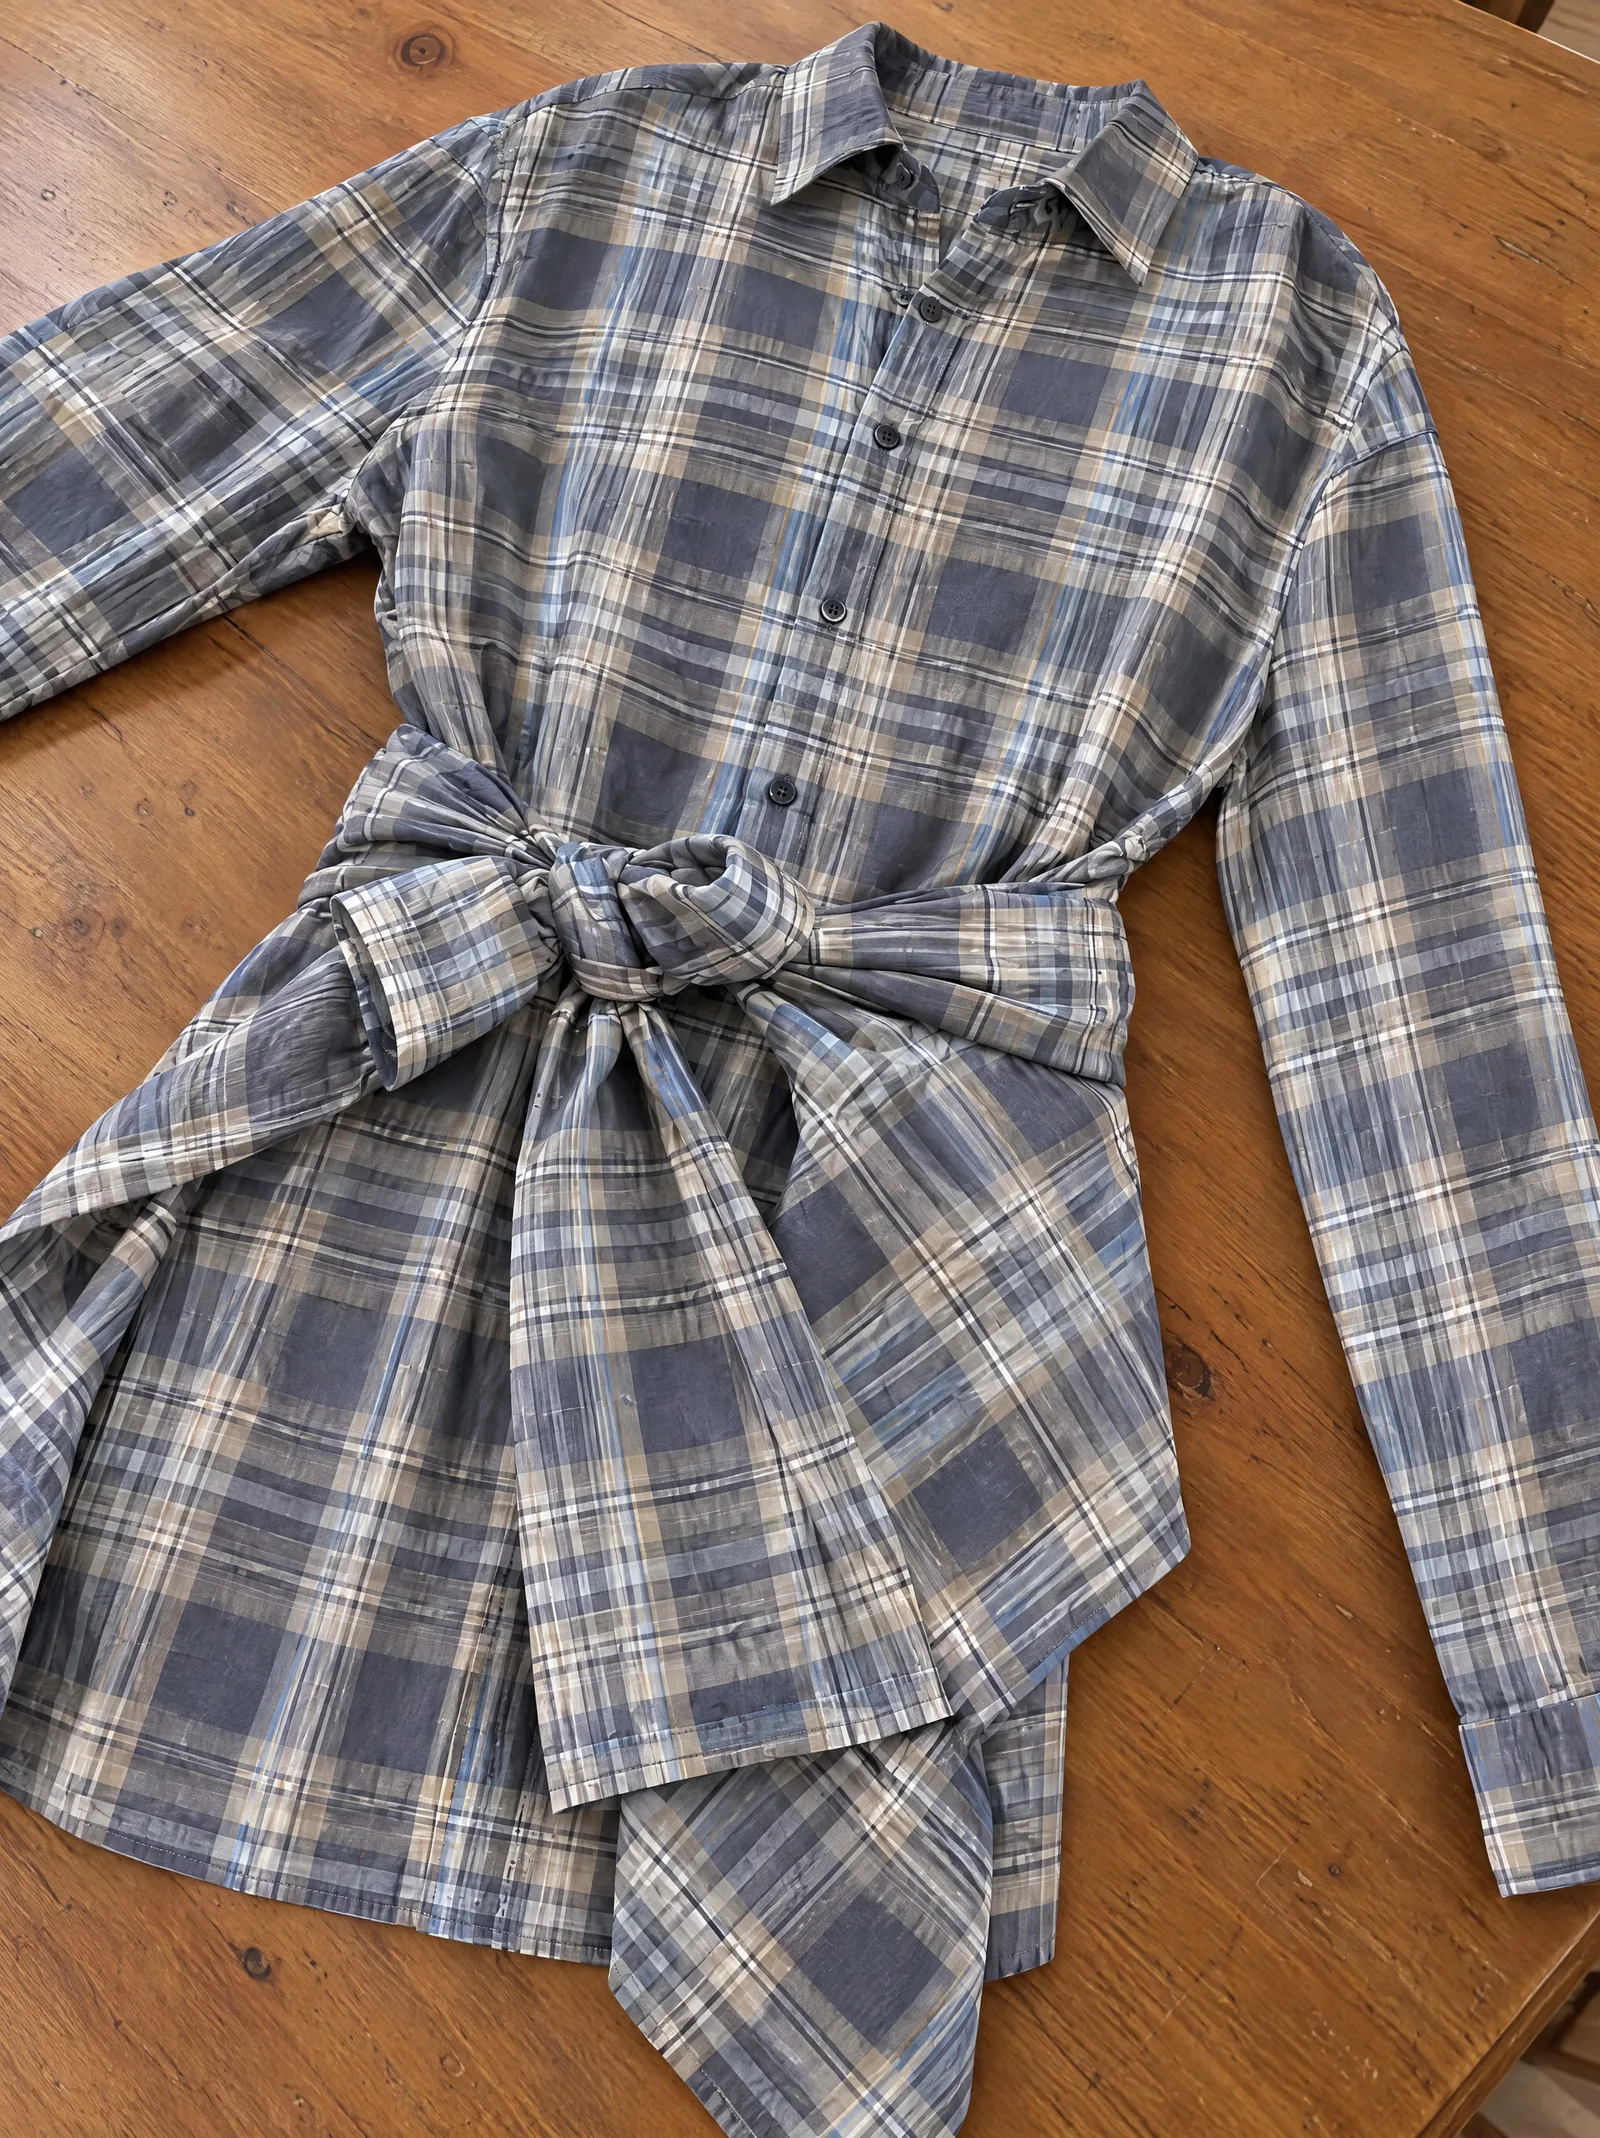
Shot from above at an angle, so the proportions are foreshortened, and a sleeve leaves the frame. We cannot measure a piece we cannot see all of.
6. One product per file
One file, one thing you want back. Styling in the frame is fine and often helps. What does not work is sending one photo of a full look and expecting each piece out of it separately.
Worn and styled, but framed so the shirt dress is plainly the subject. Deliberate styling is information, not noise.
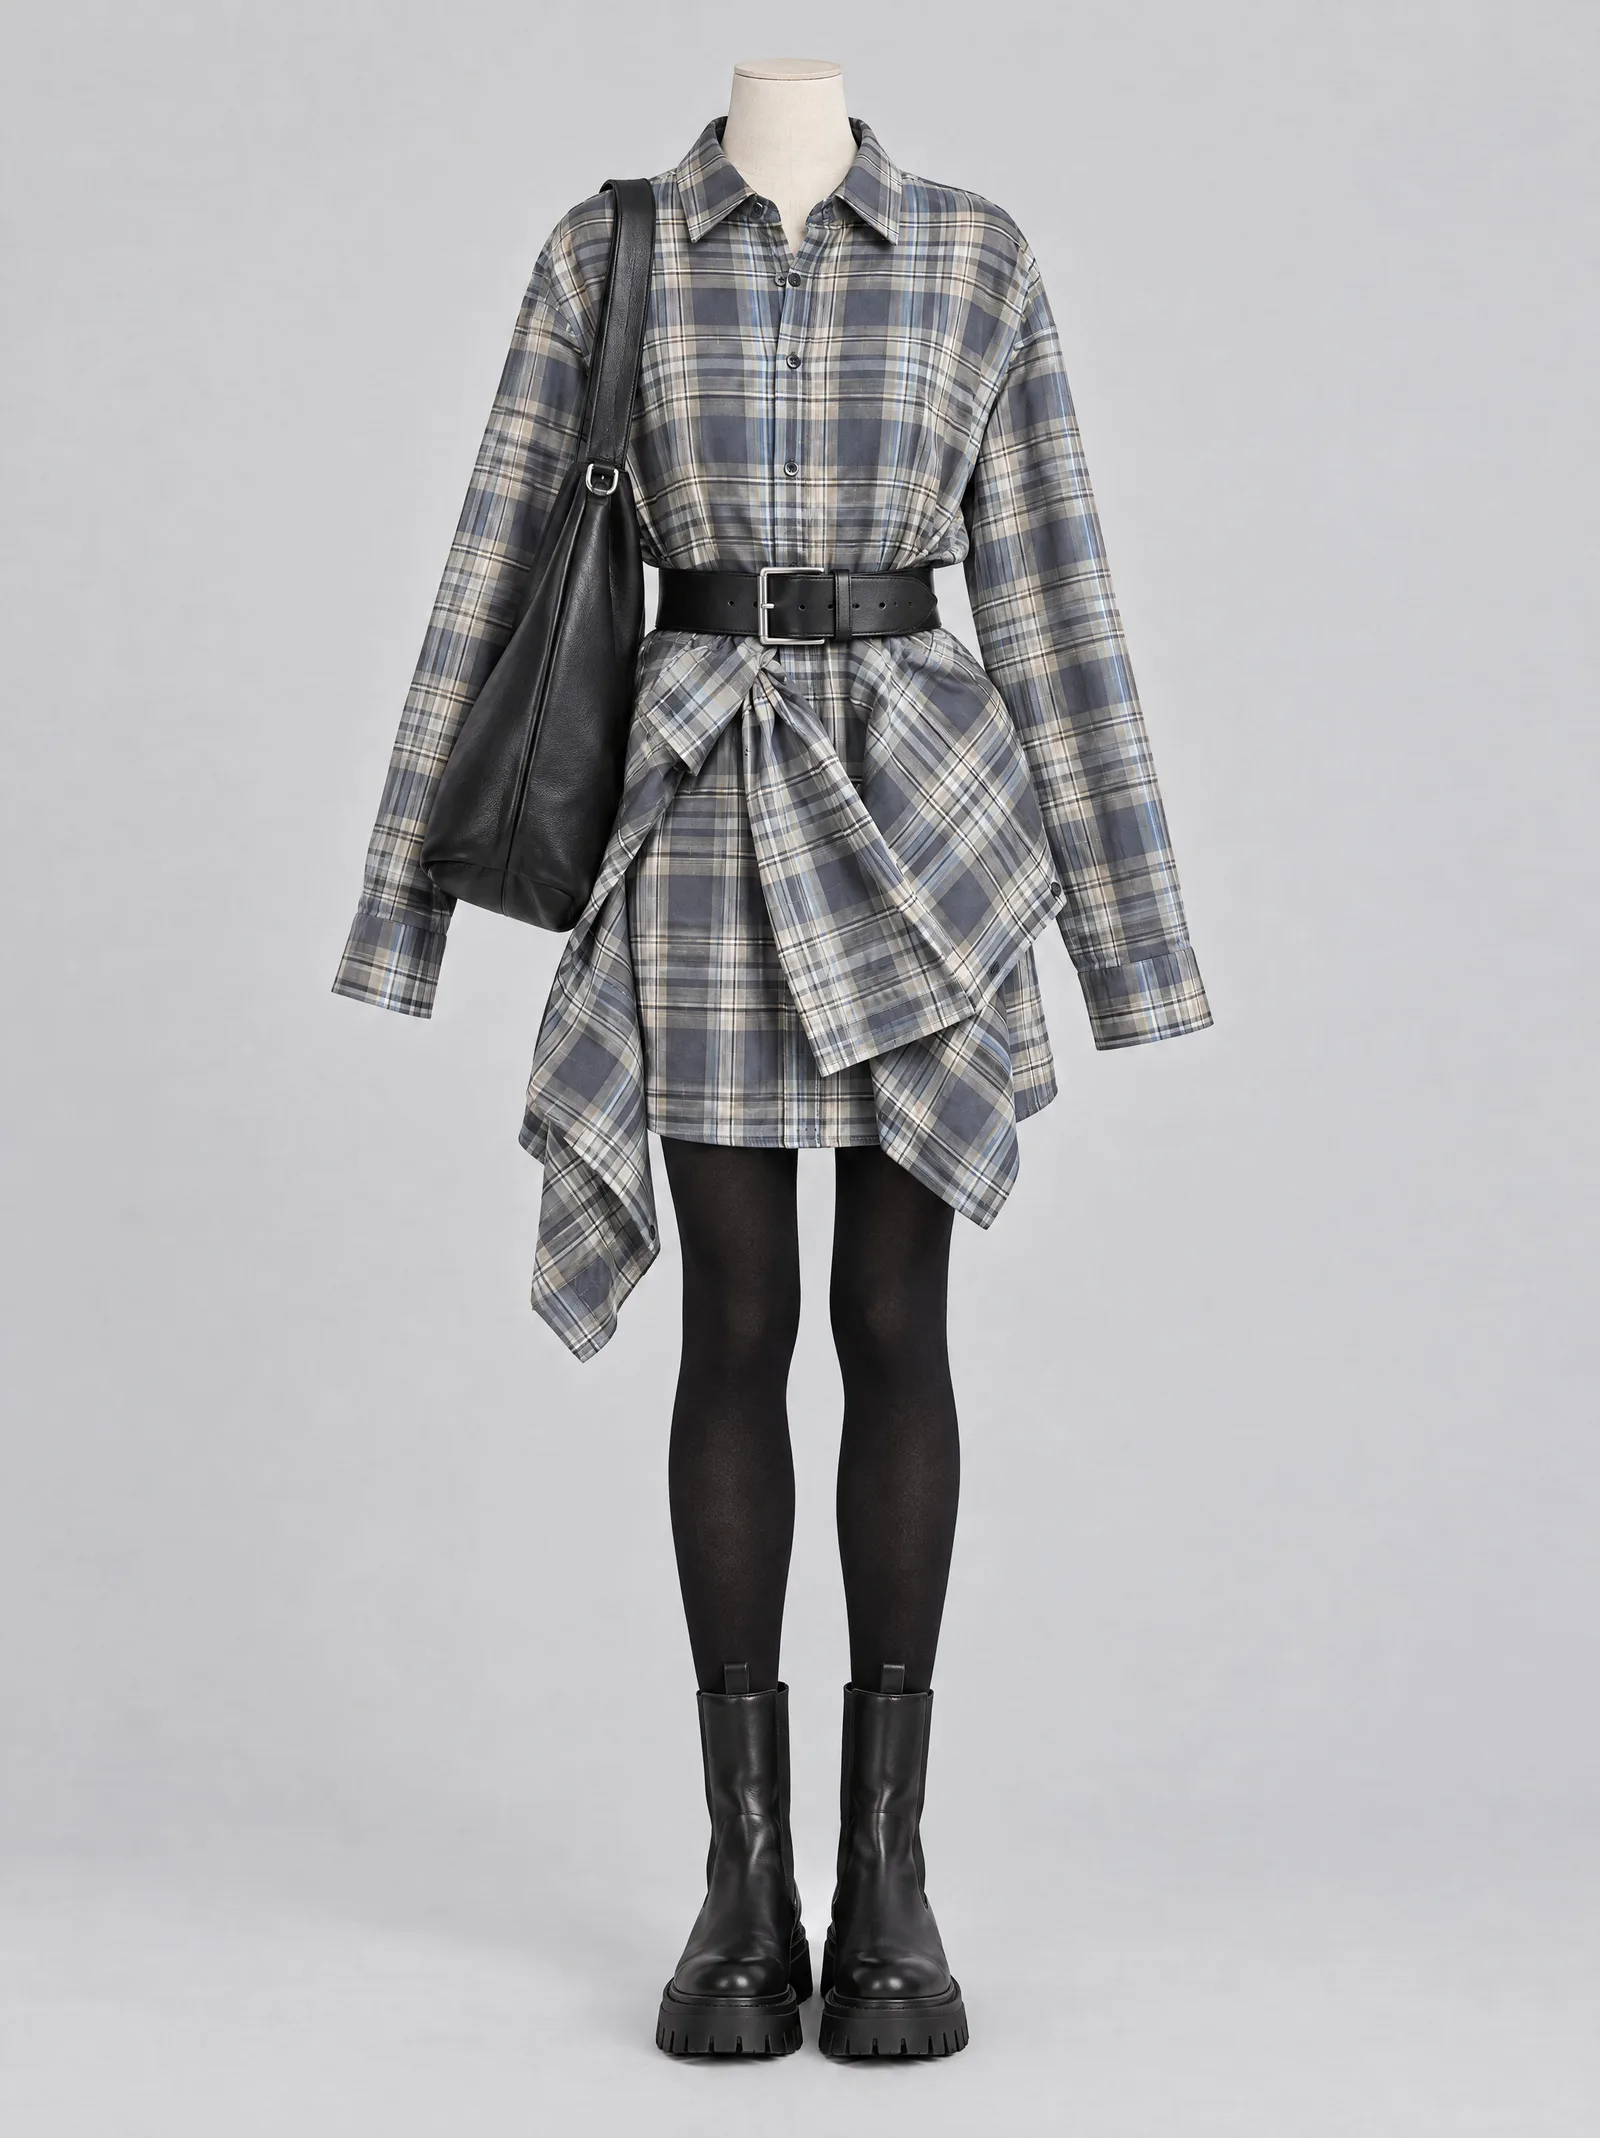
A whole look in one frame, uploaded once. Nothing here says which piece is the product, so upload the shirt dress, the boots and the bag as three files.
You only get the angles you upload
A perspective decides which angle comes out. An input decides what that angle is built from. A front shot gives you a front view. Ask for a side view without having uploaded one and the model invents the side, which is usually wrong.
So work backwards from your perspectives: for every angle you have configured, upload an input that shows the piece from that angle. Front, back, side and detail shots are separate inputs.
Send the back photo for the back view, and the front one with it. The back view has to be built from the back photograph, so an angled side shot will not do. Sending the front alongside it is what keeps colour, length and proportion consistent between the two, so the pair reads as one garment rather than two.
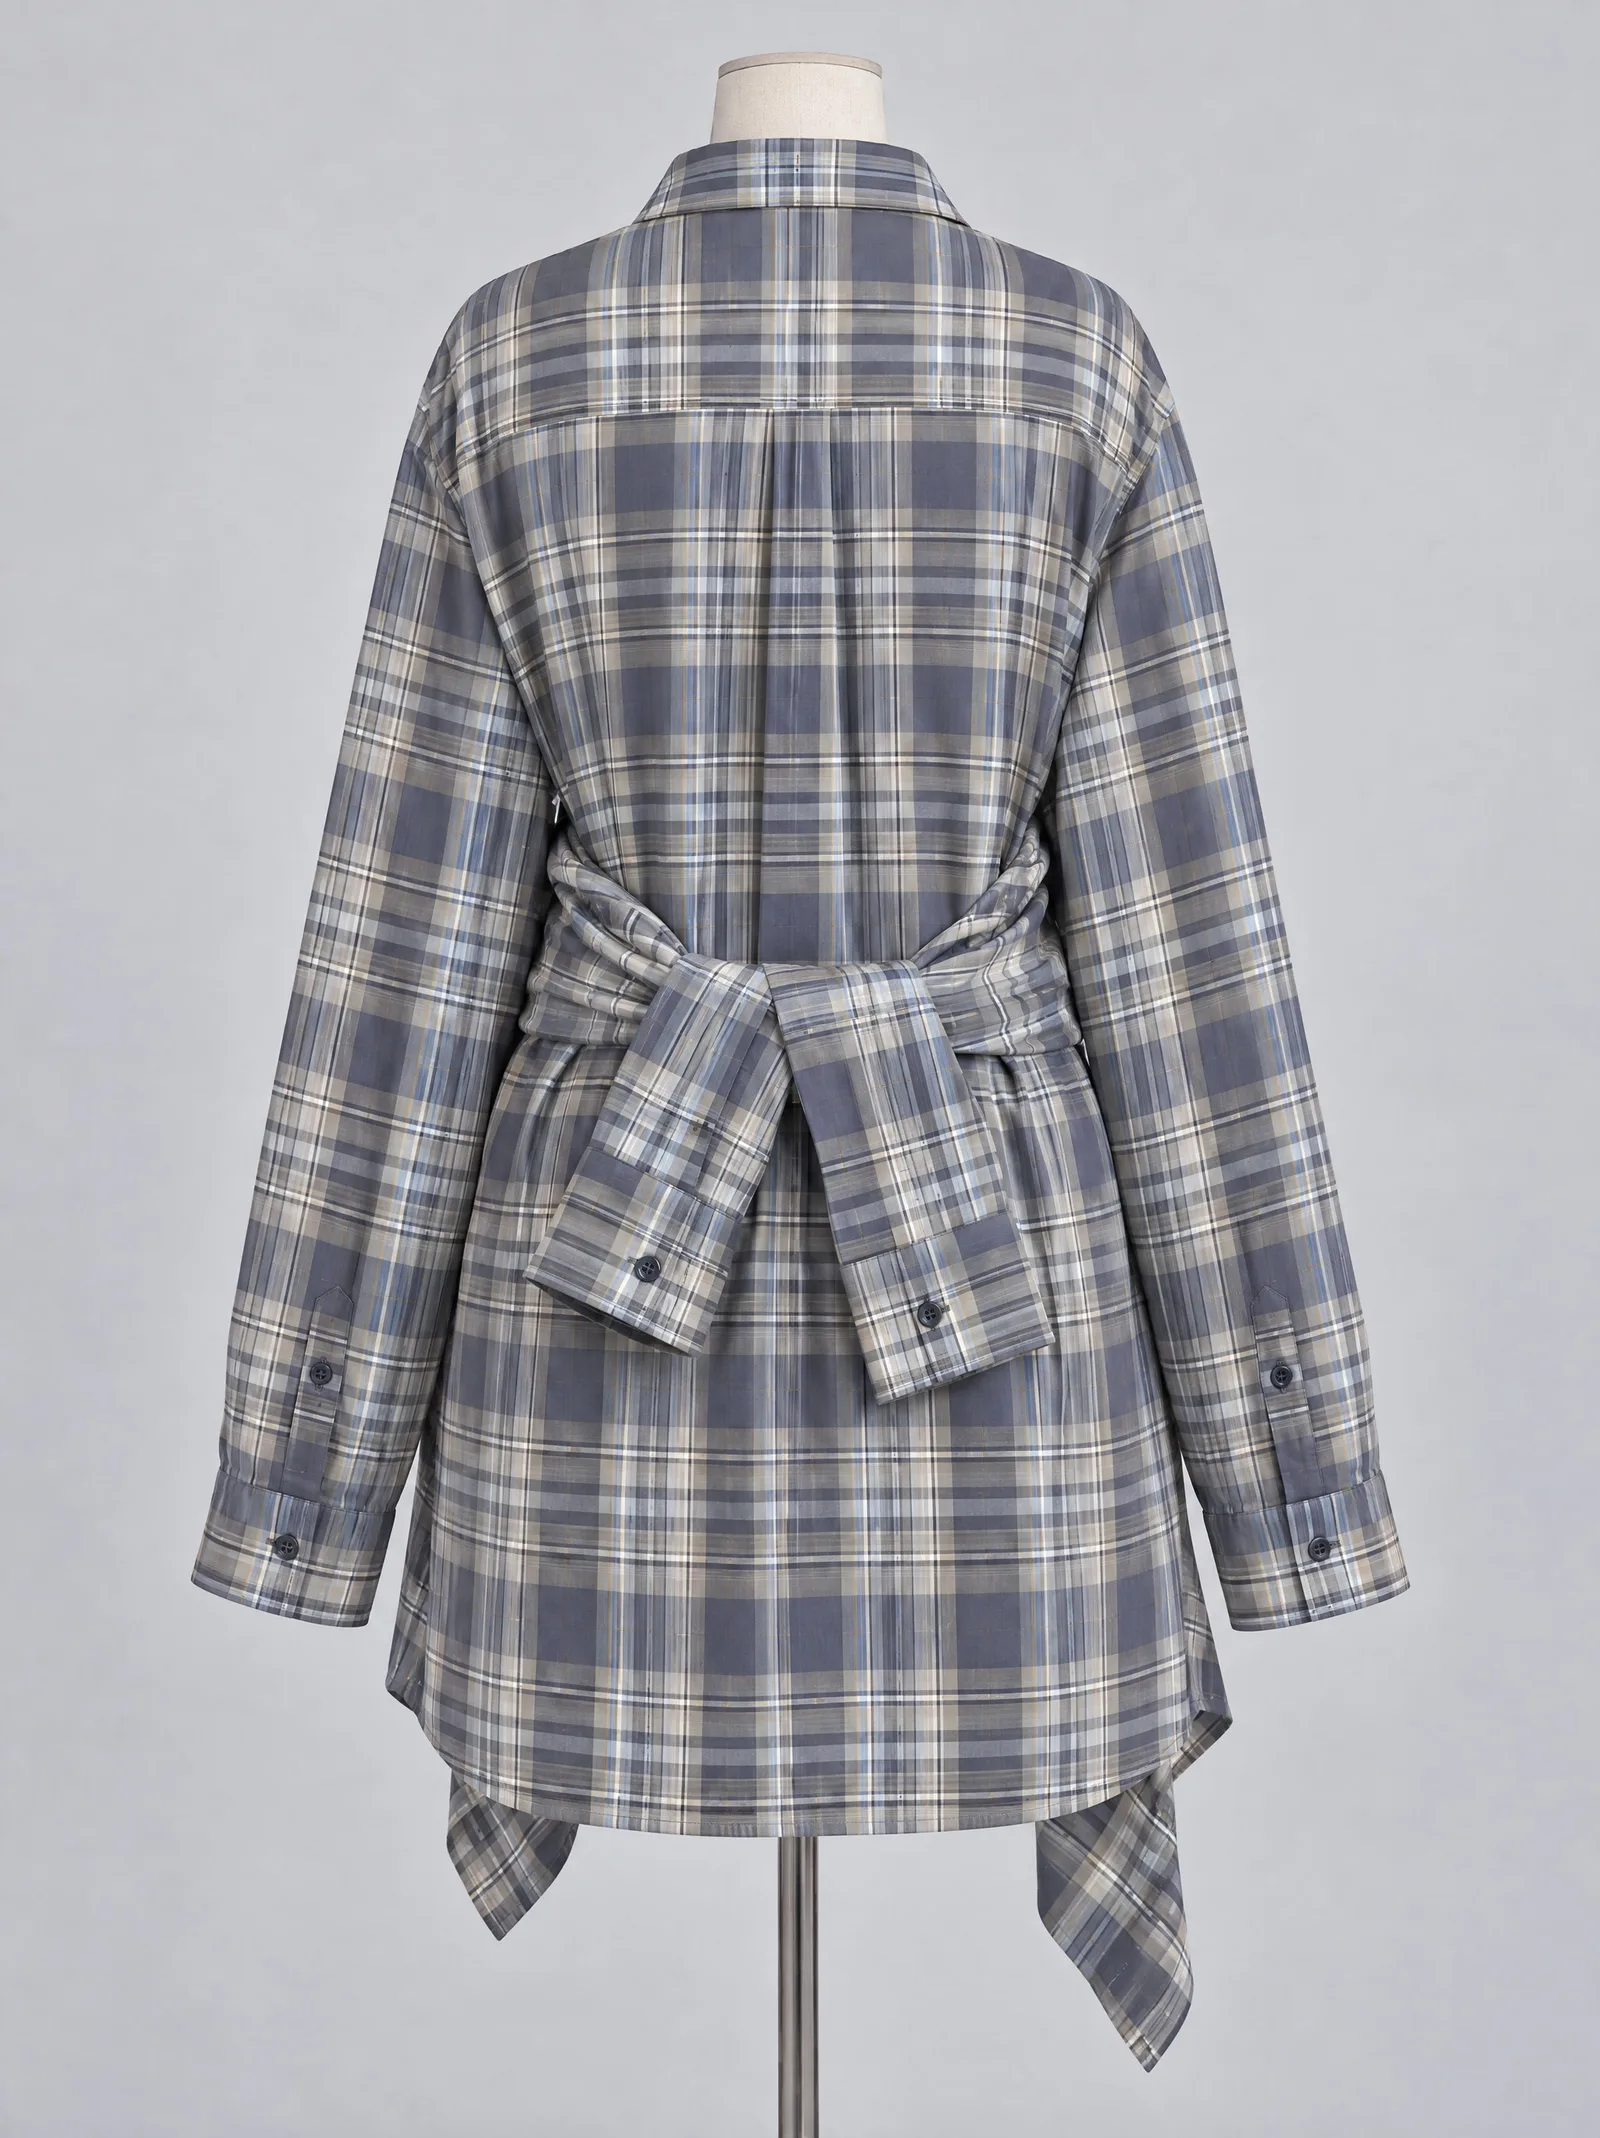
Nothing in the front file says where the yoke seam sits, how the sleeves of the tied shirt wrap round, or how the hem falls behind. Upload only the front and all three get invented, and they are invented as the most ordinary version of themselves.
A detail only appears if it came in as its own input. A trim, a label or a hardware close-up needs its own file. There is a hard floor here that no amount of describing gets around: on a full-length frame, a button occupies roughly ten pixels. A pearl finish or an engraved rim simply has nowhere to live at that size. If a feature matters, the answer is a closer photograph of it, not a longer description.
In Product Studio and Shot Planner each input also carries a view type (Front, Back, Other, Cropped) that routes it to the perspectives accepting that type. Tag them correctly, a mistagged input is the usual reason an expected angle never appears. See Product Studio for how perspectives and view types line up.
A worked example
Two packshots in, front and back, both views out. This is a real product and a real result, from Nümph.
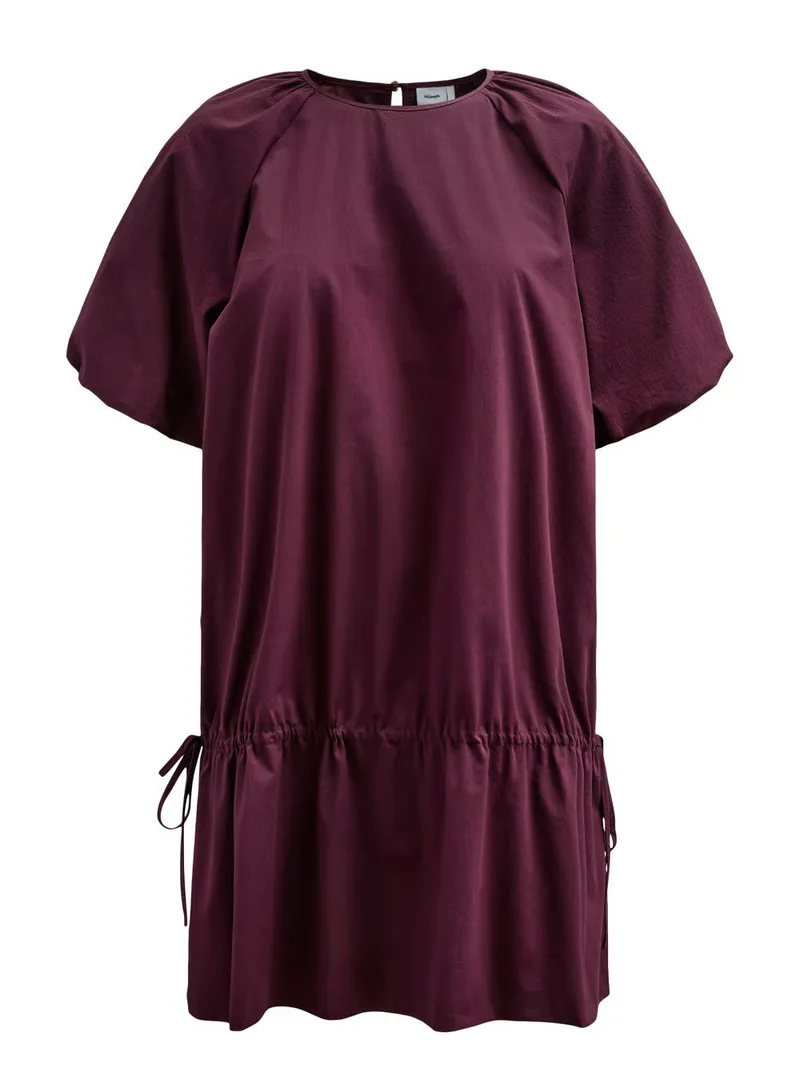
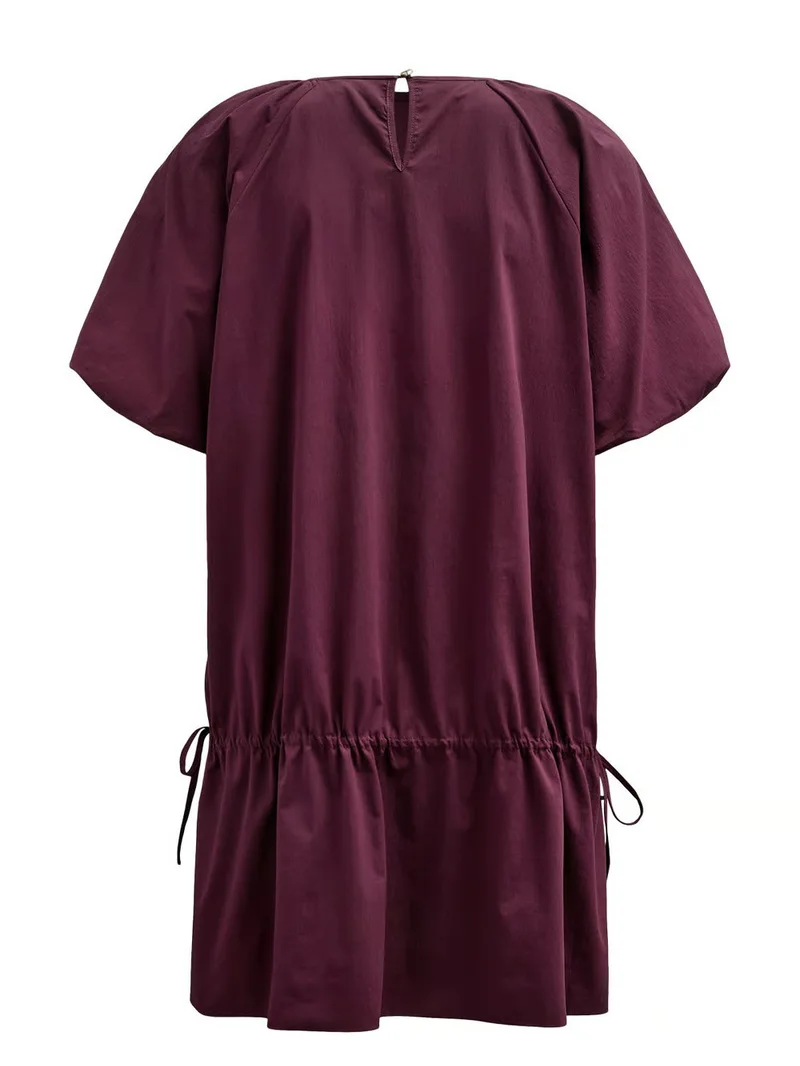
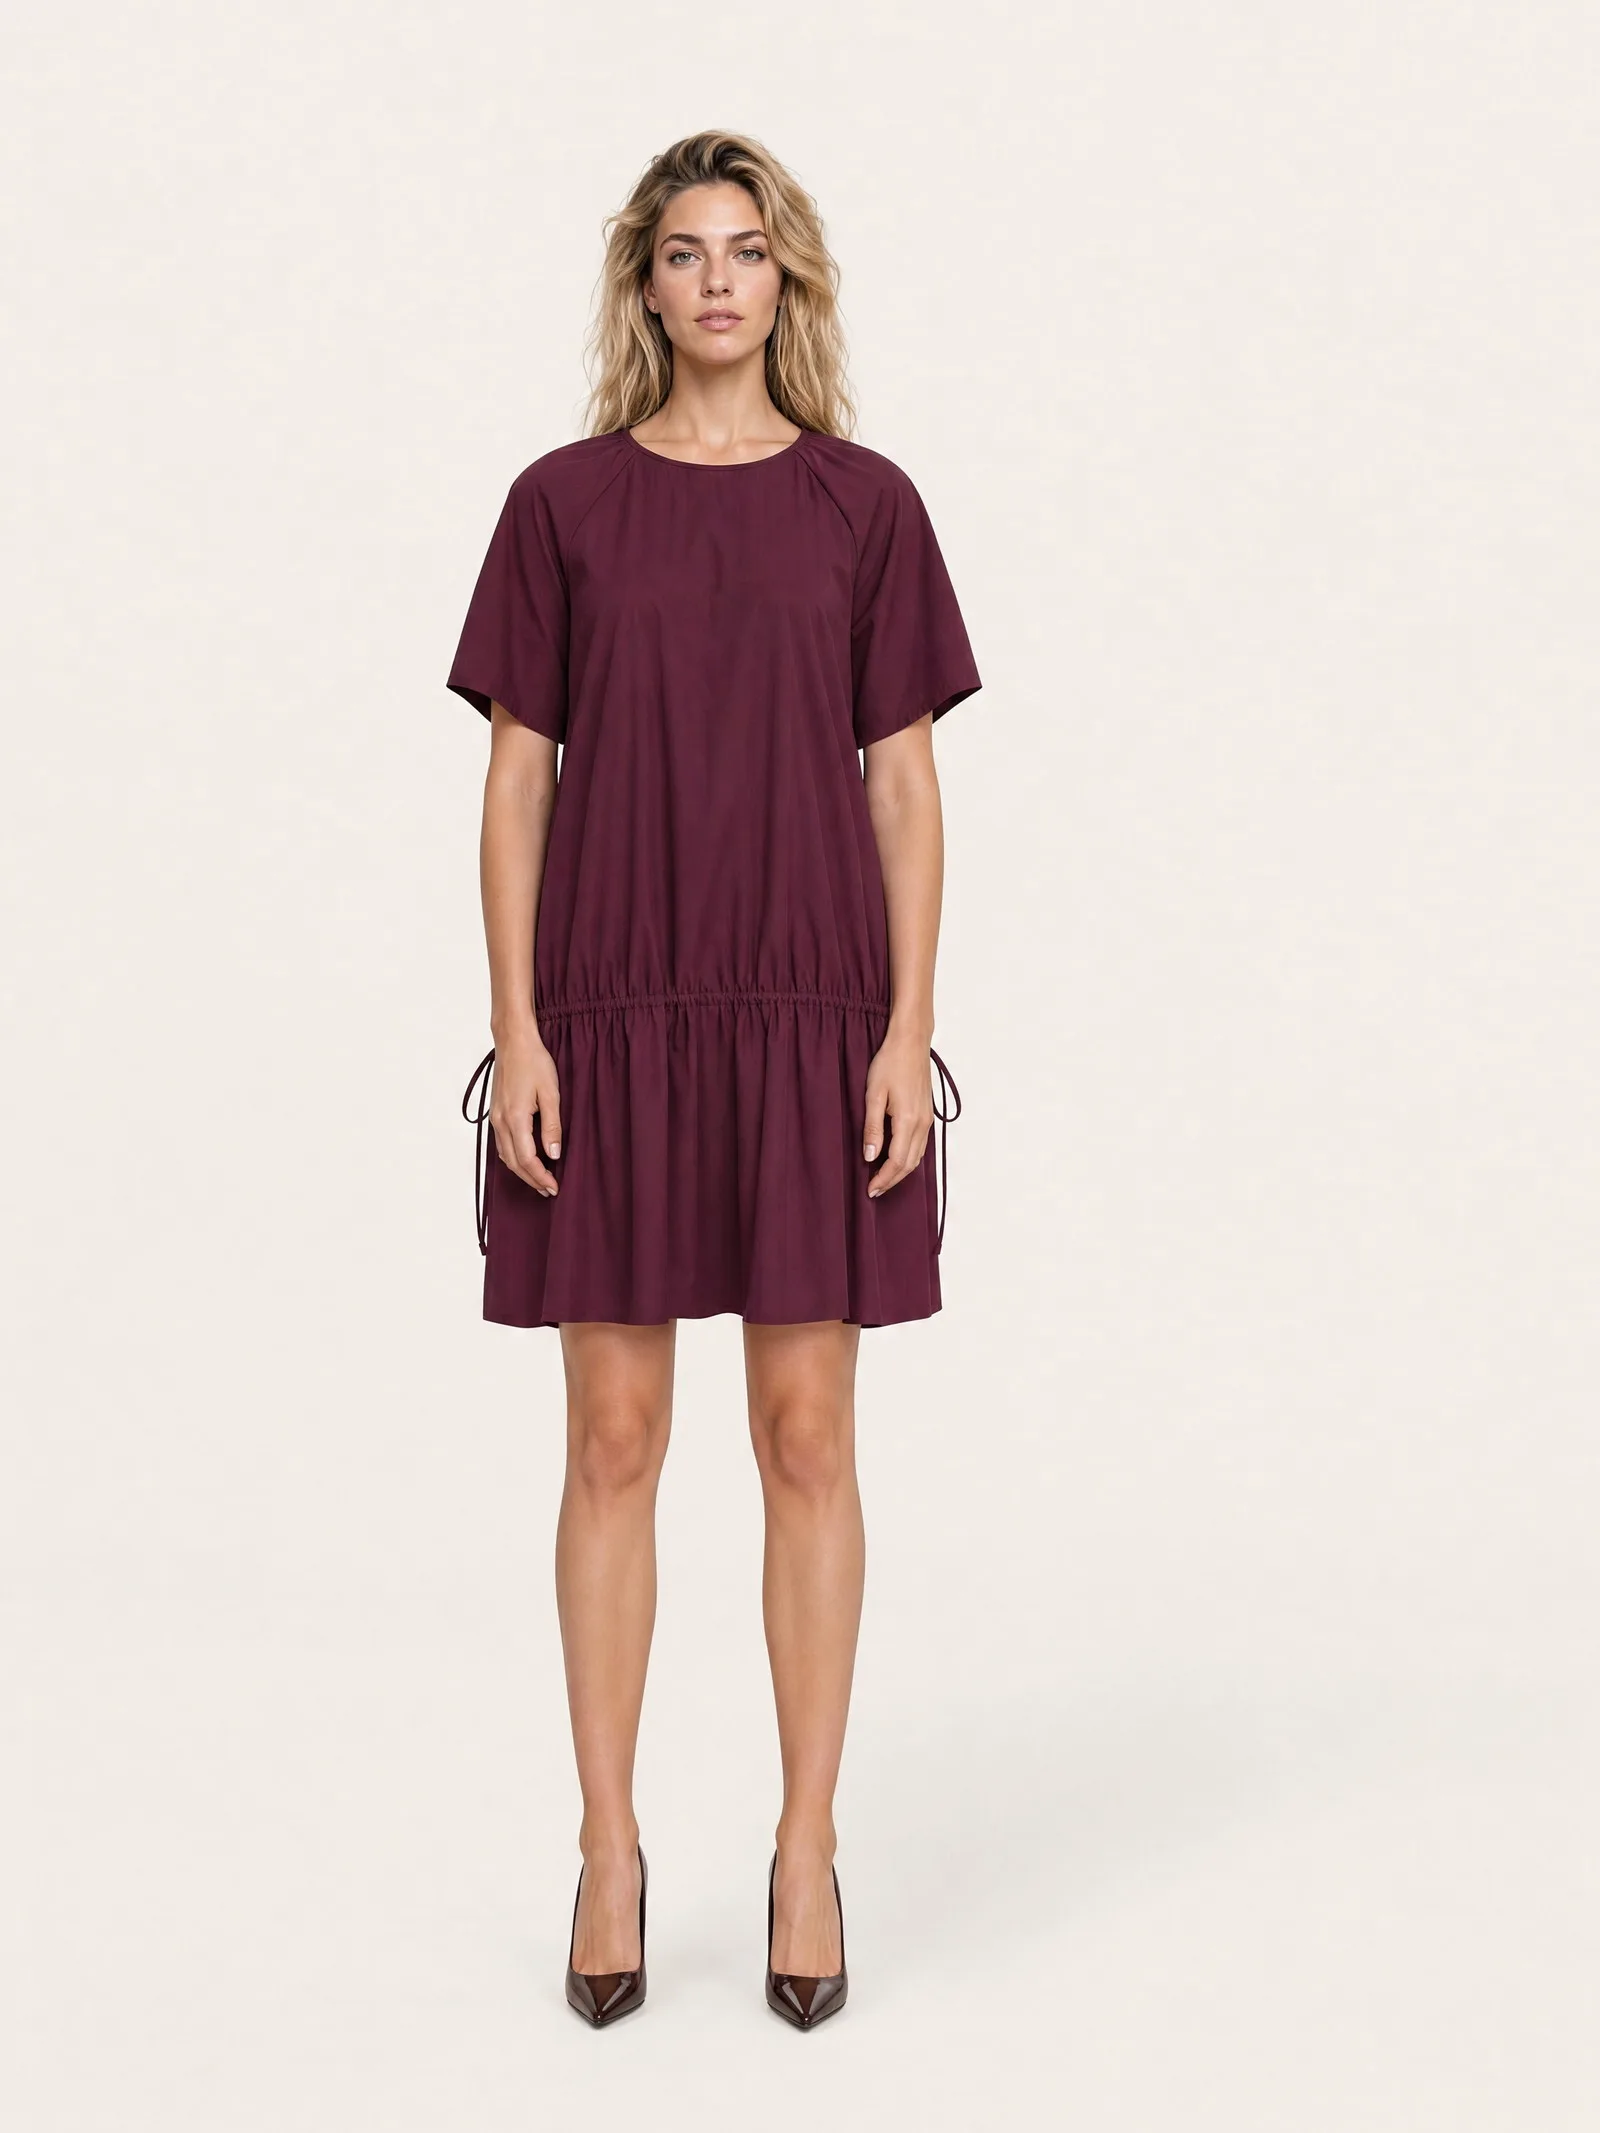
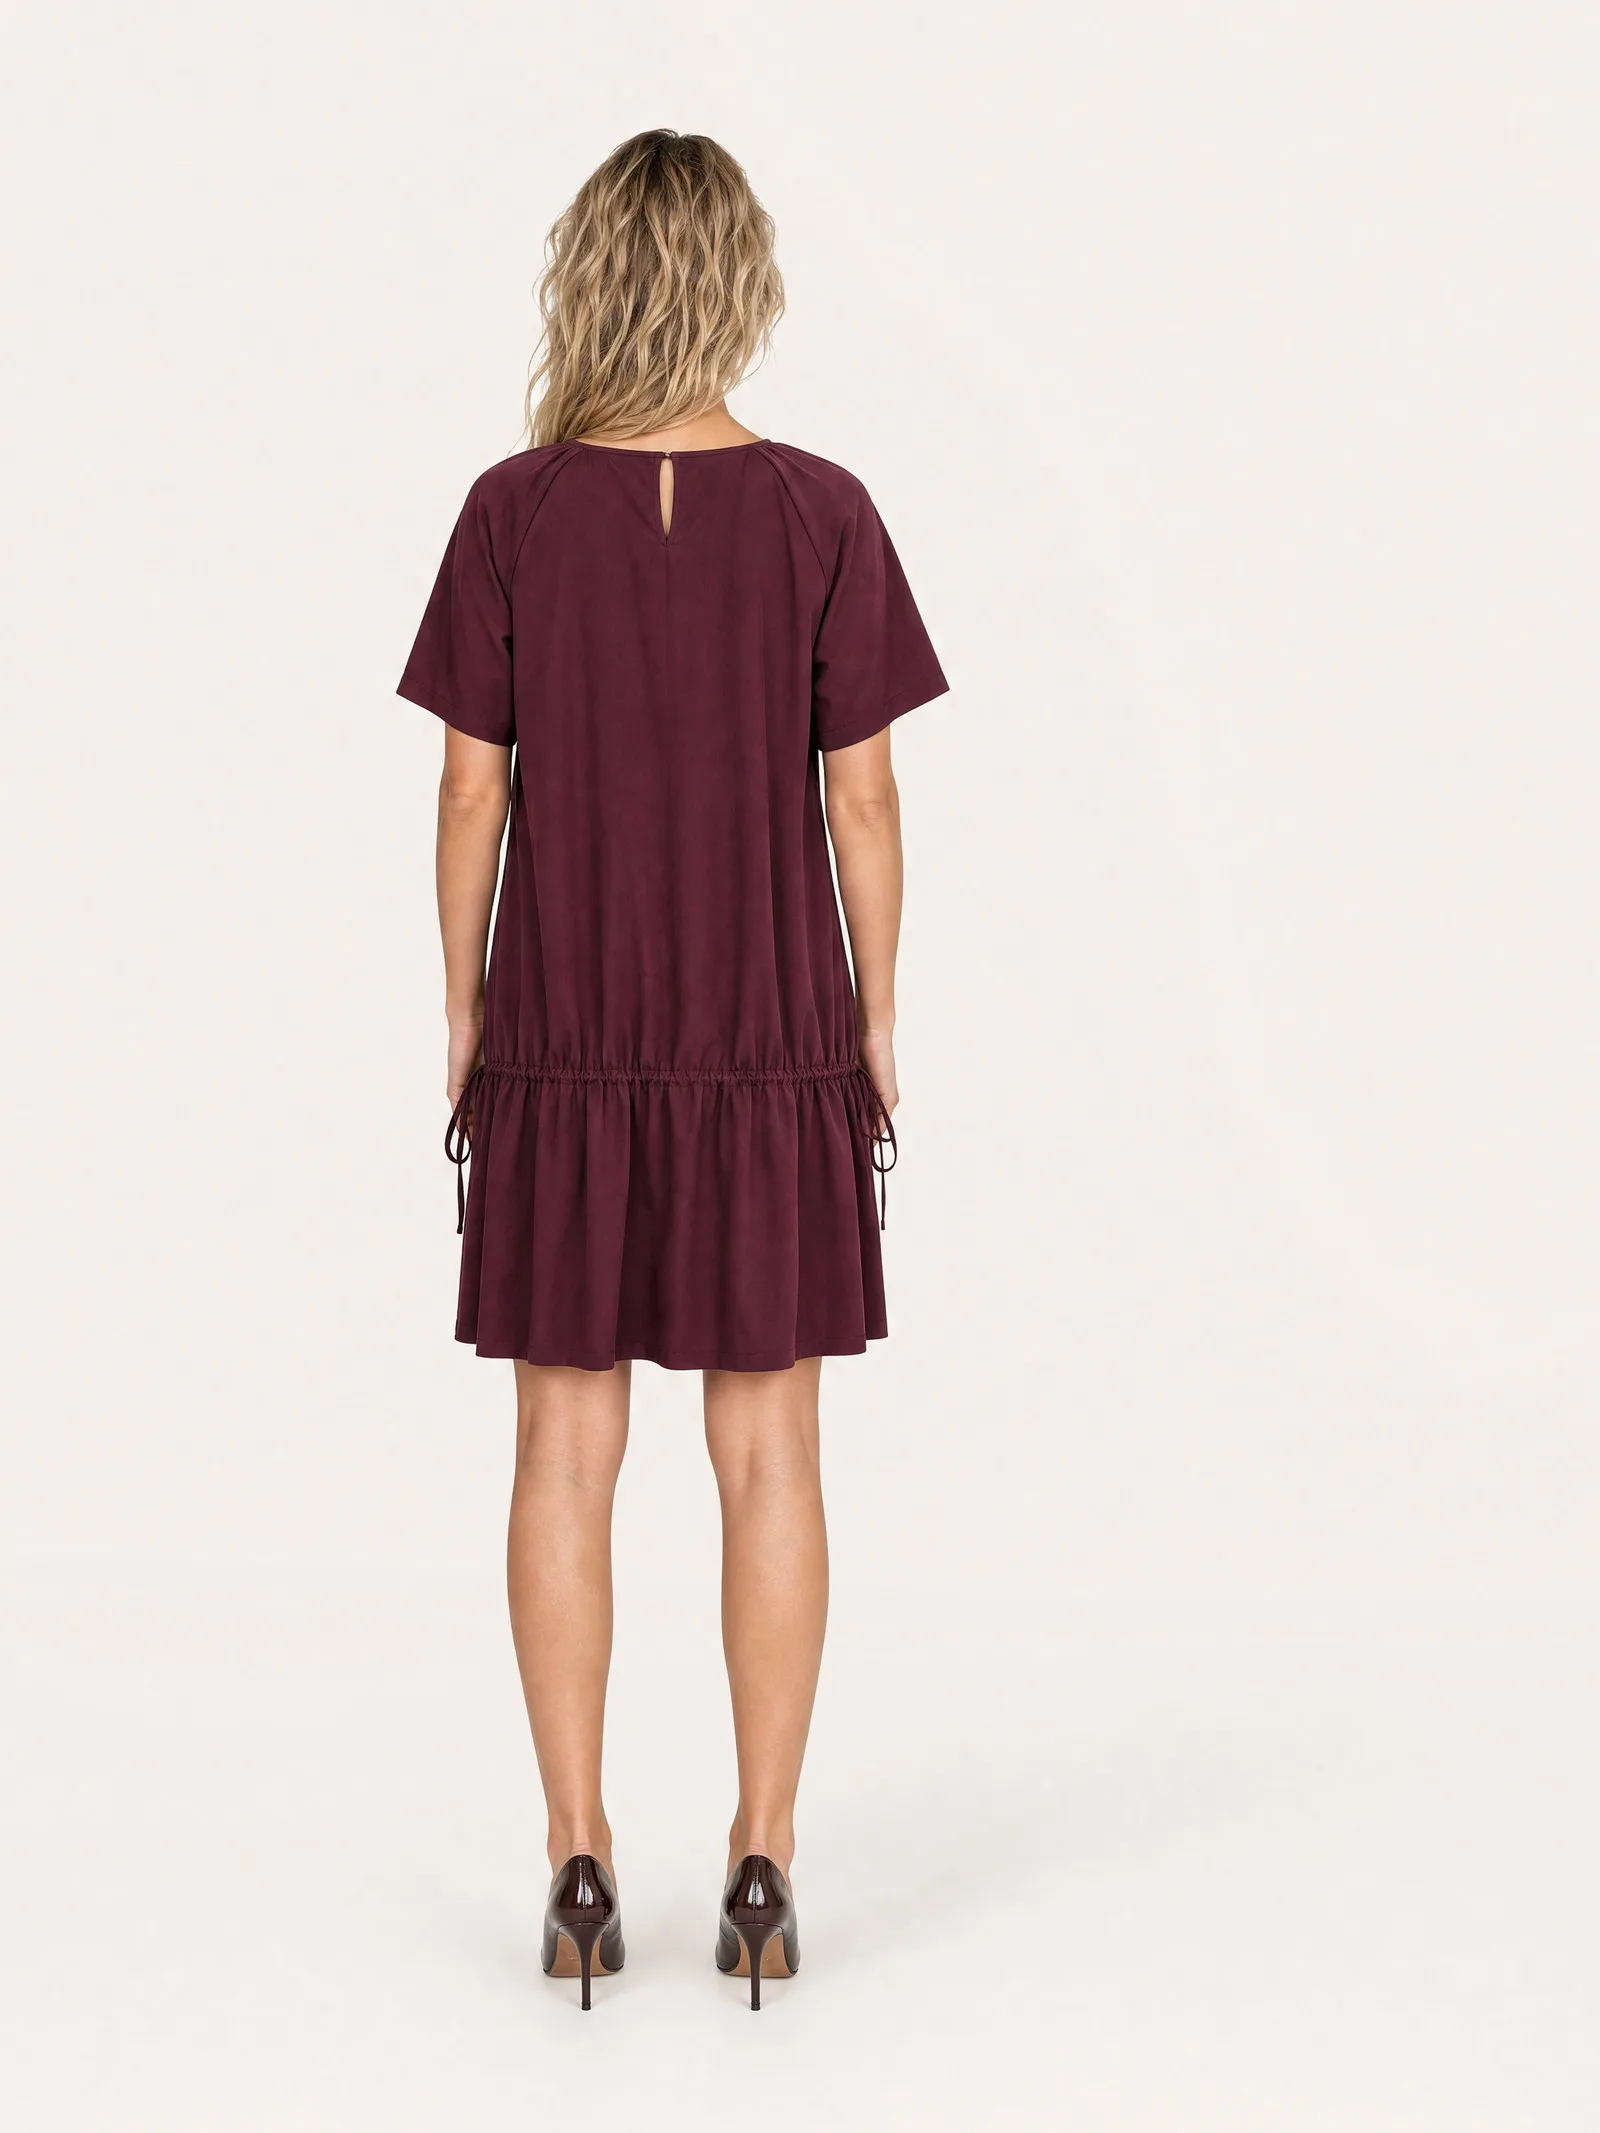
Two files with no body in them, and the drop waist, the gathered volume and the drawstring ties all survive into a worn shot. The back view exists because a back packshot was uploaded for it.
Before you upload
- The file is the original, at least 2000 px on the long edge, not a website export.
- The light is even and neutral, with no hard shadow and no colour cast.
- The background is plain and nothing else is in the frame.
- No face, and ideally no head.
- The whole piece is in the frame, front on, nothing cropped at the edges.
- One product per file.
- There is an input for every angle you have a perspective for, including a back photo for the back view.
- Anything small enough to argue about has its own close-up.
For further help, contact support@brandmachine.shop.